
This post may contain affiliate links which means I may receive a commission for purchases made through links. I only recommend products that I have personally used. As an Amazon Associate I earn from qualifying purchases. Learn more on my Private Policy page.
Dill is a popular culinary herb with numerous culinary applications. Understanding the proper techniques for harvesting and preserving dill is crucial to maintaining its freshness and flavor.
Pick mature dill stems from the outer layers, allowing inner stems to grow. Use sharp scissors to cut leafy stems close to their base, promoting new growth and a bushier plant. Avoid cutting over one-third of the plant to ensure vigorous growth through effective photosynthesis.
Let’s dive deeper into the essential aspects of harvesting dill leaves at the right stage, efficient methods for harvesting, and tips for long-term preservation through drying and freezing. Additionally, we will explore the art of harvesting dill seeds and storage practices to maintain their flavor and viability.
Table of Contents
Harvesting Dill Leaves: Timing and Methods
Harvesting dill at the right time is crucial to ensure optimal flavor and continuous growth of your plants. By following these harvesting techniques, you can enjoy the best taste from your dill while promoting a healthy and thriving plant.
Harvest Dill After it Reaches 6 Inches
Wait until your dill has grown to around 6 inches (15 cm) before you start snipping away. This ensures the plants are mature enough to provide flavorful leaves while allowing continued growth. If you harvest too early, you may inhibit future growth, and the leaves may not have developed their full flavor yet.
Efficient Dill Harvesting: Start on the Outside
To maximize your dill harvest, start with the mature stems on the plant’s outer layers. This approach lets younger, inner stems grow while ensuring a continuous supply of fresh dill. Over time, move inward to harvest the tender, younger stems.
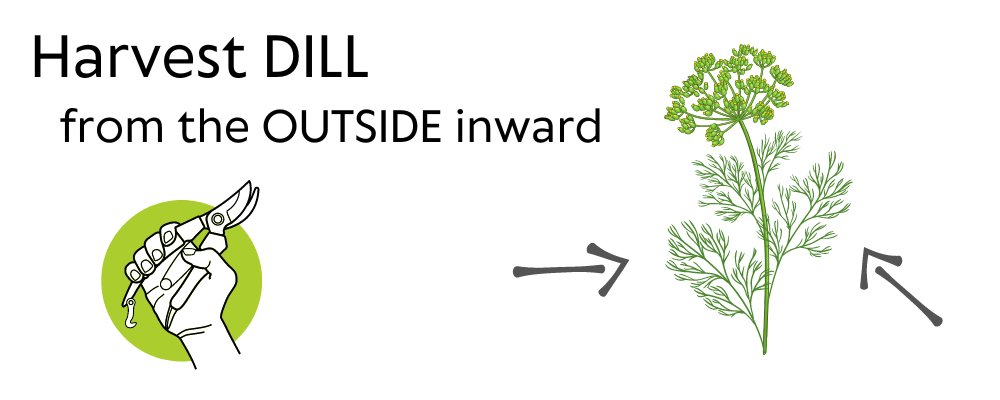
Use sharp scissors or pruning shears to cut individual leafy stems close to their base. This promotes new growth and a bushier plant, boosting overall dill yield.
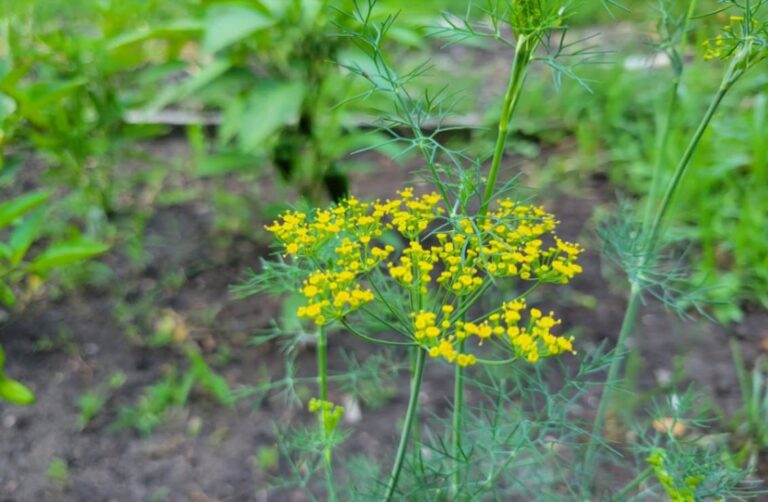
Harvest Dill Leaves Before They Turn Yellow
Dill leaves are at their peak flavor when they are young and green. As the plant matures, some of its older leaves may turn yellow. Pick the mature leaves before they turn yellow to get the best taste from your dill. The yellowed leaves tend to have a milder taste and can sometimes even be slightly bitter.
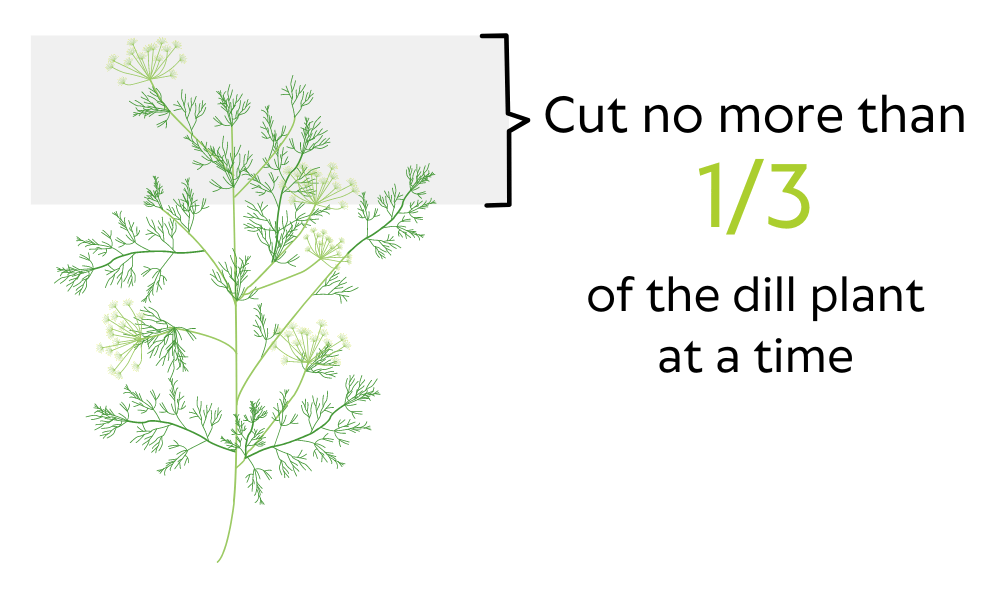
Harvest No More than One-Third of Your Dill Plant
It’s important not to get too carried away when harvesting. Cut back no more than one-third of the plant’s foliage at any given time to ensure that it continues growing vigorously throughout the season. By leaving behind enough greenery, effective photosynthesis can still occur, providing the energy needed for the plant to thrive.
Dill Preservation Techniques for Long-Term Storage
Preserving dill through drying and freezing is an excellent way to savor its flavorful leaves and seeds all year round. Creating dill-infused oils and vinegar is another way to add versatility to your culinary creations.
How to Dry Dill: 5 Easy Steps
Drying is an effective technique to preserve the flavorful dill leaves and seeds for long-term storage. Drying helps dill retain its taste and aroma by removing moisture from the herb.
To dry dill:
- Harvest the fresh sprigs when they are at their peak.
- Gently wash them under cool water to remove any dirt or insects that may be clinging to the leaves.
- Pat the dill sprigs dry with a clean towel or paper towels.
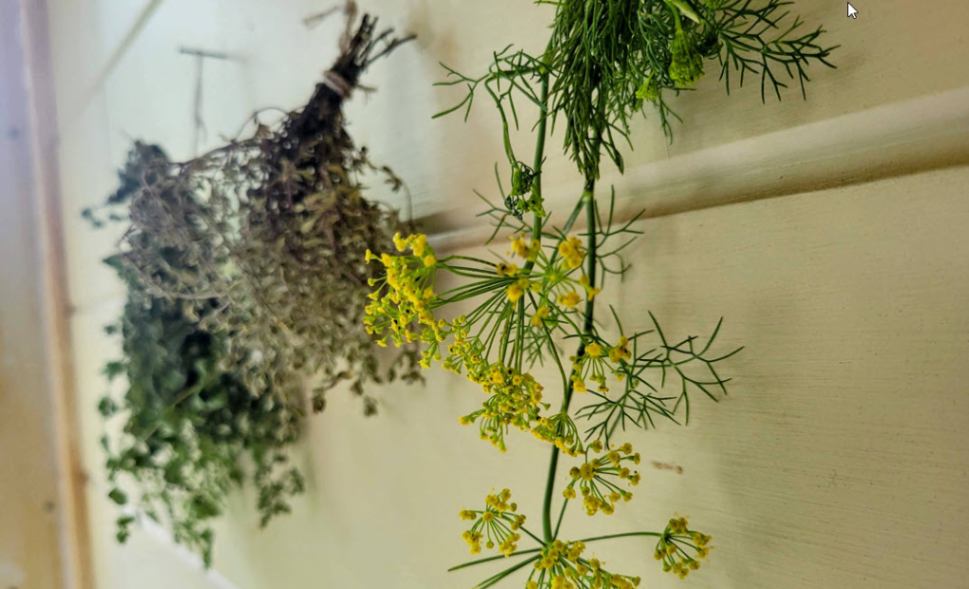
- Tie several sprigs together with kitchen twine or string, creating small bundles of dill.
- Hang these bundles upside down in a well-ventilated area away from direct sunlight. This allows air circulation and prevents mold growth during the drying process.
Within a week or two, your dill should be thoroughly dried and ready for storage. To check if it’s fully dried, simply crumble a leaf between your fingers – if it easily breaks apart, it’s dry enough.
To store dried dill properly, place the crumbled leaves or whole seeds in an airtight container such as a glass jar or resealable bag. Ensure no moisture traces before sealing tightly to prevent any potential spoilage.
Store these containers in a cool, dark cupboard away from heat sources like stoves or ovens. Properly stored dried dill can last up to 6 months without significant loss of flavor
How to Freeze Dill in 7 Steps
Freezing is an excellent option for preserving dill. To freeze your dill for storage follow these simple steps:
- Wash the dill sprigs gently under cold water to remove impurities.
- Pat dry the cleaned sprigs with paper towels.
- Separate the delicate leaves from the stems.
- Chop the dill leaves into smaller pieces for easier use later.
- Spread the chopped dill onto a baking sheet lined with parchment paper, ensuring even distribution and avoiding clumping.
- Place the baking sheet with dill in the freezer for a few hours until the dill is frozen solid.
- Transfer the frozen dill into labeled freezer-safe bags or airtight containers. Remove as much air as possible from the bags or containers before sealing tightly.

Properly sealed, frozen dill can maintain its flavor and aroma for up to six months.
Creating infused oils or vinegar with harvested dill adds versatility to storage options.
Another fantastic way to preserve your harvested dill is by creating infused oils or vinegars. This method not only preserves the herb but also infuses its unique flavors into oil or vinegar, adding versatility to your culinary creations.
To make dill-infused oil:
- Sterilize a glass jar and lid by washing them thoroughly with hot, soapy water and rinsing well. Dry the glass jar and lid completely before proceeding.
- Place fresh dill sprigs into the jar, leaving some space at the top.
- Gently heat olive oil in a saucepan until warm but not boiling.
- Pour the warmed olive oil over the dill sprigs in the jar, ensuring they are fully covered.
- Seal the jar tightly with the lid.
- Store the sealed jar in a cool and dark place for about two weeks, allowing the flavors to meld together.
For dill-infused vinegar, follow similar steps, but replace oil with white wine vinegar or apple cider vinegar.
After two weeks, your dill-infused oil or vinegar will be ready to use. Dill-infused oils and vinegars are a great addition to cucumber salads or garden salads.
How to Harvest Dill Seeds
Dill seeds are a popular herb used in various culinary dishes. Dill seeds possess a warm, slightly sweet taste with a subtle hint of anise flavor, reminiscent of caraway but milder in earthiness and pepperiness. Harvesting dill seeds at the right time is crucial to ensure optimal flavor development.
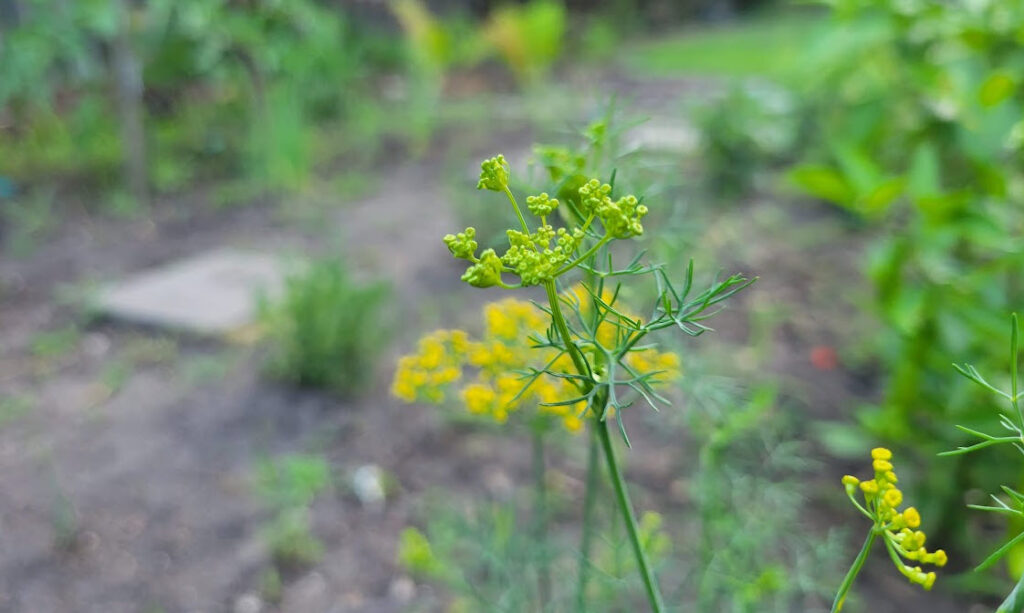
Blooming Dill Flowers: Harvesting Seeds at the Right Time
For the best quality dill seeds, wait until after the flowers fully bloom before harvesting. This allows the seeds to develop their distinct flavor. The perfect time to harvest the seed heads is once the seeds begin to turn brown but are still intact on the seed head. You want to avoid waiting too long, as overly mature seed heads may start shattering easily, causing you to lose some of your precious seeds
Drying Harvested Seed Heads
After cutting the seed heads from your dill plants, it’s crucial to dry them properly before storing them. Find a well-aerated area away from direct sunlight to hang or lay out the seed heads for drying. The ideal location would be a warm, dry spot with good air circulation.
Consider hanging your harvested seed heads upside down using twine or string. This allows gravity to help with natural drying while preventing any moisture buildup that could lead to mold or spoilage.
Best Practices for Storing Dill
Proper storage techniques are essential to ensure that your harvested dill stays fresh and flavorful.
How to Store Fresh Dill
A few simple steps can make a significant difference in preserving your fresh dill.
- Gently rinse the dill under cold water to remove any dirt or debris.
- Once clean, shake off excess water and pat it dry with a paper towel.
- Store fresh dill in the refrigerator to maintain the moisture content. Place the washed and dried dill in a plastic bag and add a damp paper towel before sealing it.
This method helps retain moisture and prevents wilting for up to 3-4 days.
Avoid Storing Fresh Dill with Ethylene-Producers
Ethylene is a natural gas produced by certain fruits as they ripen. Unfortunately, exposure to ethylene can cause premature wilting in delicate herbs like dill. Keeping your harvested dill away from ethylene-producing fruits such as bananas, apples, or avocados is crucial.

By storing your fresh dill separately from these fruits, you can extend its shelf life and preserve its vibrant green color for longer periods.
Storing Dried Dill Leaves
Store dried dill leaves in an airtight container in a cool and dark location such as a pantry or cupboard. Properly stored dried dill can maintain its flavor and potency for up to six months. However, it’s crucial to check for any signs of moisture or mold regularly. If you notice any, discard the affected portion immediately to prevent spoilage.
How to Store Dill Seed
Properly storing dried dill seeds is essential for maintaining their viability and flavor over an extended period. Dill seeds can remain viable for up to four years when stored correctly.
Ensure the dried seed heads are completely moisture-free before removing the seeds. Gently rub or crush the seed heads to release the seeds, and discard any remaining plant material.

Transfer your dill seeds into airtight containers such as glass jars or resealable bags to store your dill seeds. This helps protect them from exposure to air, moisture, and pests that could compromise their quality. Label each container with the date of harvest for reference.
Store your dill seeds in a cool and dark place for optimal shelf-life. Avoid exposing them to direct sunlight or extreme temperature fluctuations.
Conclusion: Mastering the Art of Harvesting Dill
From harvesting at the right maturity level to preserving and storing the flavorful leaves and seeds effectively, growing dill in your home garden can yield a constant supply of this versatile herb for your kitchen. It’s crucial to use correct harvesting methods and adhere to the best preservation and storage practices to maintain dill’s freshness and aroma.
Additionally, understanding how to store dill seeds appropriately ensures their viability and flavor for extended periods of time. With the guidance provided in this article, you can successfully grow, harvest, and store dill, bringing a fresh and flavorful touch to your dishes throughout the year.
Frequently Asked Questions (FAQs)
When should dill be picked?
Dill can be picked after it has grown to around 6 inches (15 cm) in height. This is to ensure the plant has grown enough leaves to keep growing. Harvesting too early could inhibit future growth and result in less intense flavor.
How do I store fresh dill?
To store fresh dill, rinse it under cold water to remove dirt, pat it dry with a paper towel, and place it in a plastic bag with a damp paper towel in the refrigerator. Avoid storing it with ethylene-producing fruits like bananas or avocados to prevent premature wilting and maintain its freshness for 3-4 days.
When should I harvest dill seeds?
Harvest dill seeds after the flowers fully bloom and the seeds begin to turn brown but are still intact on the seed head. This ensures optimal flavor development and prevents the loss of seeds due to shedding.
Can I freeze dill for long-term storage?
You can freeze dill for long-term storage. Follow the simple steps of washing, drying, chopping, freezing, and storing in labeled freezer-safe bags or containers to maintain their flavor and aroma for up to six months.
How do you preserve dill in vinegar?
To preserve dill in vinegar, follow these steps: Sterilize a glass jar and add fresh dill sprigs, leaving space at the top. Warm the vinegar on a stove and pour it over the dill, ensuring full coverage. Seal the jar and store it in a cool, dark place for about two weeks. Dill-infused vinegar works great on salads.
How long can you store dried dill?
To dry dill, harvest fresh sprigs, wash them and pat them dry. Tie several sprigs together and hang them upside down in a well-ventilated area away from direct sunlight. After one to two weeks, the dill should be thoroughly dried. Store in a cool, dark place for up to 6 months without significant loss of flavor.
What grows well with dill?
Dill grows well with cucumbers, corn, lettuce, asparagus, cabbage, broccoli, and kale because it attracts helpful bugs that keep away common garden pests. Dill companion planting also works well with herbs like basil and chervil.
Last Updated on 23 October 2023 by Bob Lee