
This post may contain affiliate links which means I may receive a commission for purchases made through links. I only recommend products that I have personally used. As an Amazon Associate I earn from qualifying purchases. Learn more on my Private Policy page.
Drying basil allows you to ensure it stays usable for an extended period of time. Not only does drying basil prevent waste, but it also allows you to enjoy the distinct taste of this herb when it’s out of season.
What is the best method to dry basil so it doesn’t lose its aroma and flavor? I conducted an extensive experiment, testing traditional air drying, oven drying, using a food dehydrator, a microwave, and even an air fryer. My findings, coupled with survey data, yielded some surprising results.
Let’s explore these 5 methods for drying basil to determine which works best for your needs.
Table of Contents
Why Dry Basil Leaves?
Drying basil leaves is a simple yet effective way to preserve your basil harvest year-round. Not only does it extend the shelf life of basil, but it also ensures a steady supply until the next growing season. So, why should you consider drying your own basil at home? Let’s explore the reasons:
Increased Longevity
By drying basil, you significantly increase its longevity. Fresh basil tends to have a short lifespan, with leaves wilting and losing their vibrant green color within days. Properly stored, dried can be stored for many months without losing its flavor or aroma.
Superior Quality and Cost-Effectiveness
Unlike store-bought basil which may lose its potency over time, homemade dried basil retains its natural essence and has superior quality compared to store-bought varieties.
Drying your own basil is also far more economical in the long run. Instead of buying expensive store-bought dried herbs, you can enjoy the cost saving of cooking with your own home-grown dried basil while relishing its superior flavor.
Concentrated Flavor Profile
Dried basil has a more intense flavor profile compared to fresh leaves. As moisture evaporates during the drying process, essential oils become more concentrated, resulting in a more robust and savory taste. This concentrated flavor adds depth and complexity to dishes such as pasta sauces, soups, stews, marinades, and salad dressings.
Preparing Basil for Drying
Using freshly harvested basil is the key to achieving the best results when drying. To ensure optimal flavor and quality, it is essential to follow proper preparation techniques. Here are some important steps to consider:
Rinse Basil with Cold Water
To eliminate any dirt, debris, or insects that may have found their way onto your basil leaves, give them a thorough rinse with cold water. This step not only helps maintain cleanliness but also ensures that no unwanted substances end up in your dried herbs.

Pat Basil Leaves Dry
After rinsing, gently pat the basil leaves dry using paper towels or a kitchen towel. Removing excess moisture is crucial as it prevents mold growth, particularly when using the air drying process.

Discard Damaged or Wilted Leaves
Before beginning the drying process, carefully inspect your basil leaves. Remove any damaged or wilted leaves as they may affect the overall taste and texture of the dried herb.
If you plan on air drying your basil, you can skip removing individual leaves from stems, but for most drying techniques like using a dehydrator or an oven, it’s recommended to remove the basil leaves from their stems before proceeding to the frying process.
1) How to Air Dry Basil

Air drying is one of the simplest and most traditional ways to preserve basil. This drying method offers several advantages, including heightened flavor retention, ease of use, affordability, and maintaining essential nutrients. To air-dry basil, follow these steps:
- Harvest and prepare your basil, discarding any damaged leaves. Wash and pat them dry.
- Bundle the basil stems together into manageable bundles using string, twine, or rubber bands. It’s crucial to keep these bundles relatively small since large bundles of basil will not receive adequate airflow and could easily develop mold.
- Create an ideal drying environment by choosing a warm, dry location with good ventilation. Avoid direct sunlight, as it can cause the herbs to lose their vibrant color and flavor.
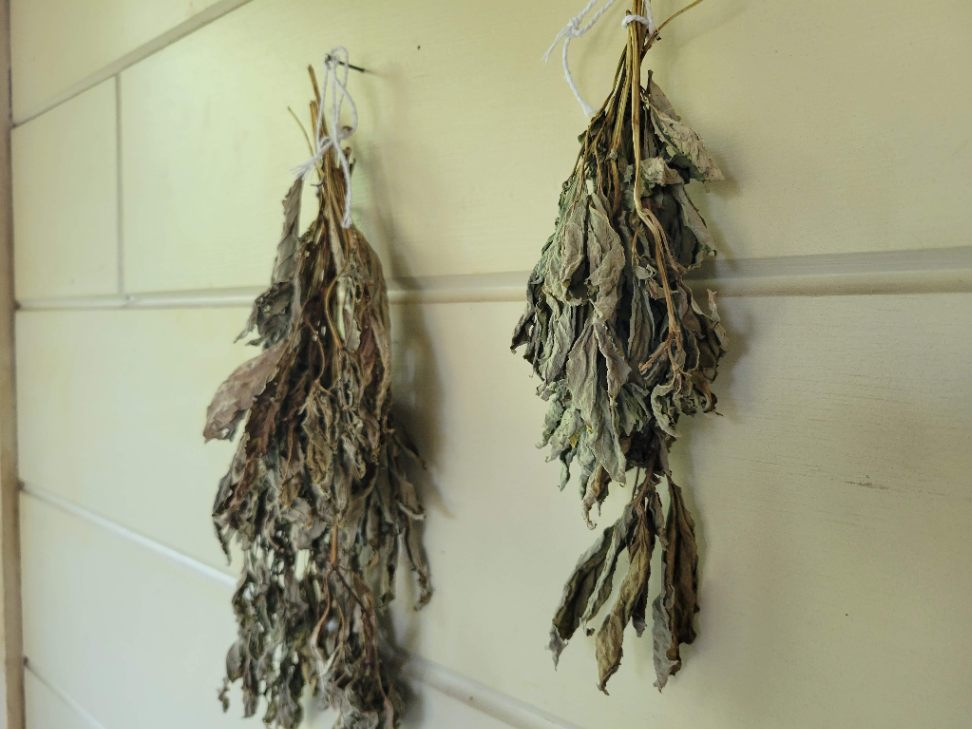
- Hang bundles upside down or lay them out on racks for drying.
- Allow 2-4 weeks for the basil to air-dry completely. Patience is key. During this time, check on the progress every 4 or 5 days and rotate the bundles if necessary. This will ensure even drying and prevent any potential moisture buildup.
Drawbacks to Air Drying Basil
Despite its advantages, the air drying method has a few drawbacks:
- Time-Intensive: This method requires far more time compared to other drying techniques.
- Aroma Degradation: Compared to other drying methods, I found the aroma of air dried basil to be significantly less intense.
- Risk of Mold & Contamination: It’s important to note that air drying also carries a risk of contamination and mold development if proper precautions are not taken.
The variable temperature and humidity in your drying environment can affect the consistency of the results, making it essential to monitor the process closely.
2) How to Dry Basil in a Dehydrator

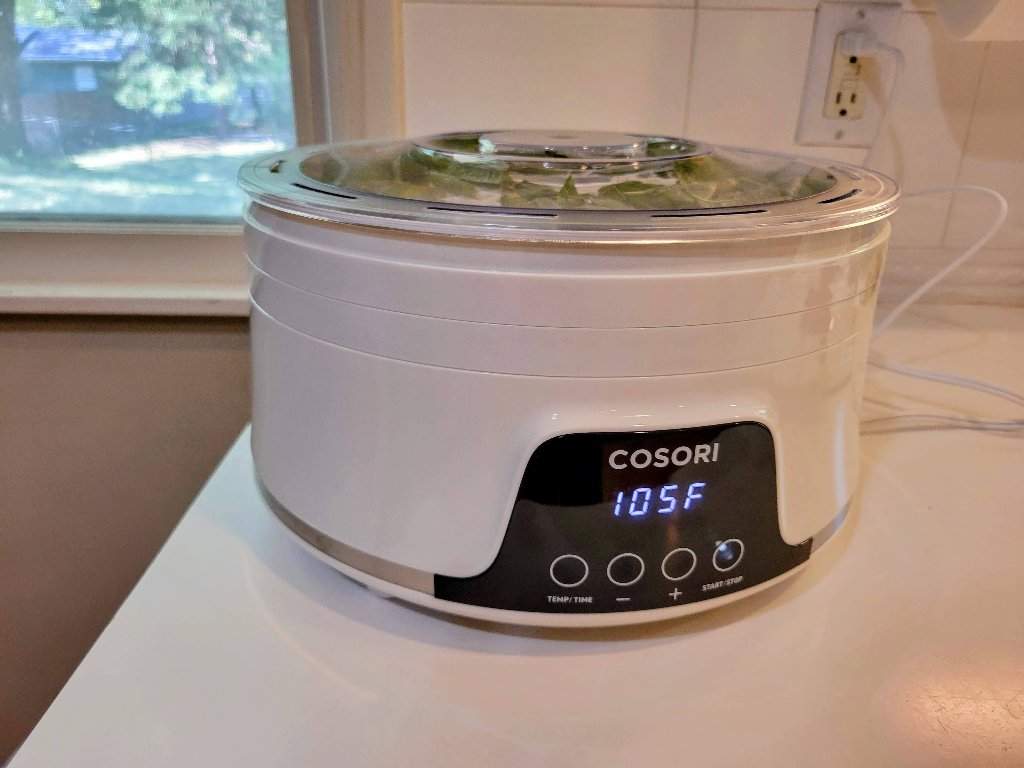
Food dehydrators are an excellent method for drying moisture-loving herbs like basil. Food dehydrators can operate at low temperatures between 95-105°F (35-40°C), which helps preserve the flavor and aroma of the basil.
Advantages of Dehydrating Basil
Drying basil in a food dehydrator offers several benefits, including:
- Convenience: Using a food dehydrator allows you to just set it up and let the dehydrator do its thing for hours.
- Preservation of Color, Taste, and Aroma: Drying basil in a dehydrator helps preserve its vibrant green color as well as its overall aroma and taste compared to other drying methods.
- Consistent Results: Using a dehydrator ensures consistent results with low risk of mold or spoilage compared to other drying methods such as air drying.
Steps to Dehydrate Basil
Follow these steps to dry your basil leaves in a food dehydrator:
- Prepare Basil Leaves for Drying: To begin the process of drying basil with a dehydrator, start by preparing your fresh basil leaves. Remove any damaged or discolored leaves and gently wash them under cold water. Pat them dry with a clean kitchen towel or paper towels.
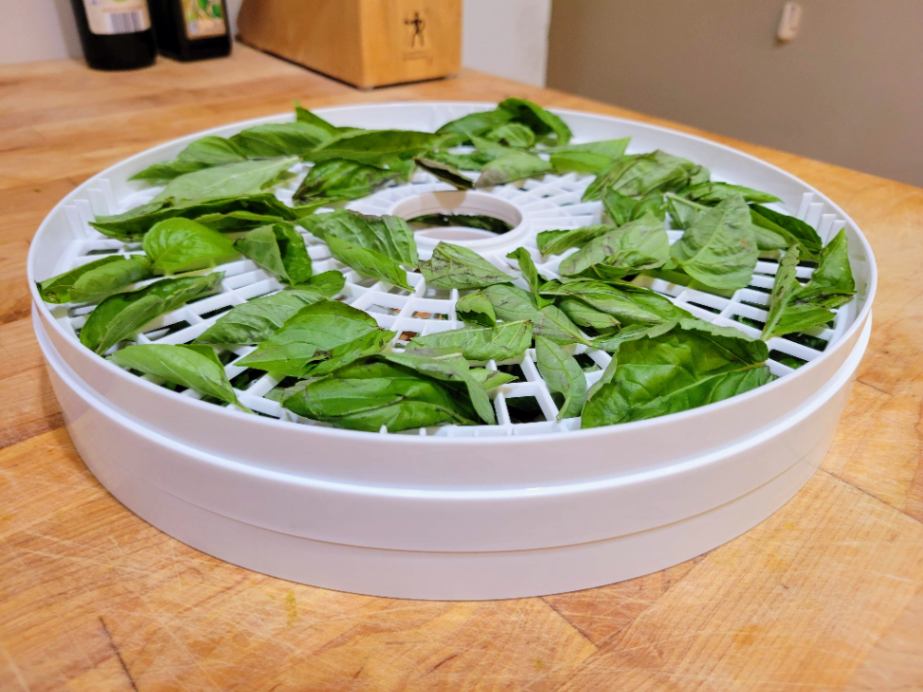
- Arrange Basil on Dehydrator Trays: Next, carefully arrange the basil leaves on the dehydrator trays without overlapping them. Ensure there is enough space between each leaf to allow proper air circulation during the drying process. Overlapping may result in uneven drying or clumping together.
- Place Trays in Dehydrator: Once you have arranged the basil leaves on the trays, place them into your food dehydrator according to the manufacturer’s instructions. Set the temperature to around 95-105°F and adjust the timer accordingly.
- Let Basil Dry 12-24 Hours: The recommended drying time for basil in a dehydrator is usually between 12 and 24 hours; however, this may vary depending on your specific model and batch size. I found that it took closer to 24 hours to full dry basil in my dehydrator. It’s important to follow your dehydrator’s instructions for optimal results. Store dehydrated basil in an airtight container.
Disadvantages of Dehydrating Basil
While using a food dehydrator has its advantages, there are some disadvantages worth considering.
- Longer Drying Time: With the exception of air drying, drying with a food dehydrator takes considerably longer than any of the other herb drying methods.
- Cost: The initial cost of purchasing a food dehydrator can be an investment for some individuals.
- Storage Space: Storing the dehydrator can be a challenge, especially if you have limited kitchen space.
- Limited Drying Capacity: Furthermore, the capacity of the dehydrator may limit the quantity of basil you can dry at once.
3) How to Dry Basil in the Oven

Drying basil in the oven is a quick and convenient method. If you’re looking for an efficient way to preserve your fresh basil leaves, the oven-drying method offers some clear advantages, including:
- Speed: Oven drying your basil is one of the quickest methods for drying your herb leaves.
- Controlled environment: Similar to the food dehydrator method, oven drying allows you to set the oven to a specific temperature for controlled drying.
Steps to Oven Drying Basil
To dry your basil leaves in an oven, follow these simple steps:
- Preheat your oven to 170°F: To begin, preheat your oven to its lowest temperature, typically around 170°F (76°C). This gentle heat will gradually remove moisture from the basil leaves without scorching them.
- Arrange basil leaves on a baking sheet lined with parchment paper to prevent any sticking or burning. Arrange the leaves in a single layer, making sure not to overcrowd the leaves as this can hinder proper drying. By spacing them out evenly, each leaf will have ample airflow for even drying.
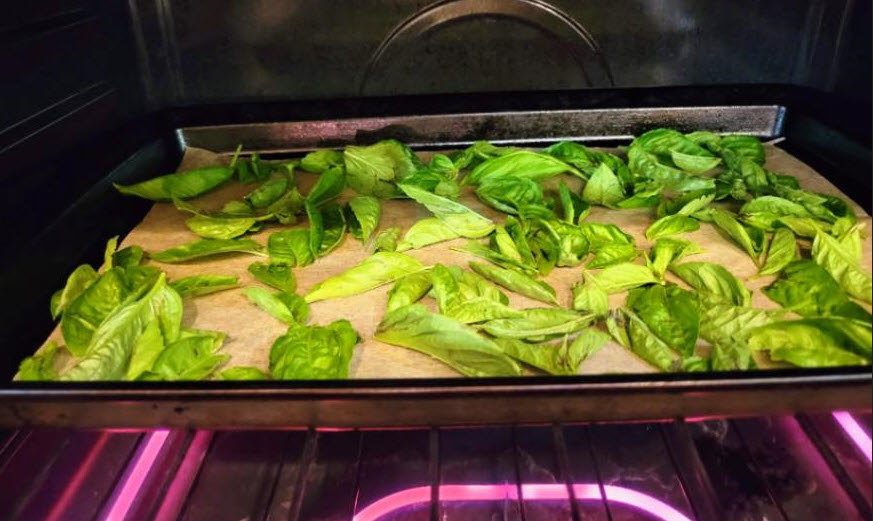
- Prop oven door open slightly to allow moisture to escape during the drying process. This small opening will prevent condensation from building up inside the oven and ensure that your basil dries properly.
- Bake for 45 minutes to 2 hours, but start checking after 30 minutes. The exact time may vary depending on factors such as humidity levels and leaf thickness. Keep an eye on them until they become crispy and crumble easily between your fingers.
Disadvantages of Oven Drying Basil
While using the oven has its advantages in terms of speed and convenience, there are a few downsides worth considering:
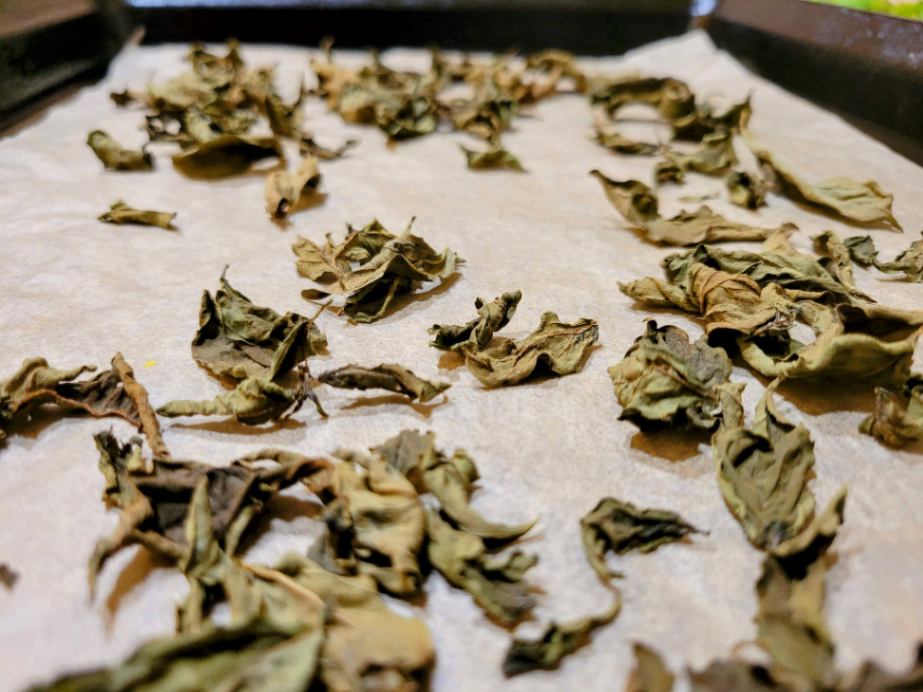
- Loss of Quality: Compared to some other methods, the aroma and taste of your basil is not preserved as well when oven drying.
- Easy to Burn: It’s easy to overcook your herbs using the oven method if you’re not carefully monitoring the drying progress.
- Energy Consumption: One drawback is energy consumption since ovens require electricity or gas to operate. There might be some uneven drying if certain spots in your oven have hotter temperatures than others.
- Limiting Cooking Space: Another factor to keep in mind is that while you’re drying basil in the oven, you won’t be able to use it for cooking at the same time unless you have multiple ovens or don’t need it for other purposes temporarily.
Keep these items in mind when determining if oven drying your herbs is the method you want to use.
4) How to Dry Basil in an Air Fryer

While traditional methods like air drying or using an oven can be effective, there’s an unconventional yet highly efficient way to dry basil – with an air fryer.
Advantages of Air Drying Herbs with an Air Fryer
- Convenience and Speed: One of the main advantages of using an air fryer to dry basil is the speed and convenience it offers. Unlike traditional methods such as air drying that can take days, an air fryer can dry your herbs within 15 minutes! This is especially useful when you have limited time on your hands.
- Good Quality Preservation: I was pleasantly surprised at how well both the aroma and taste of basil were preserved using the air fryer method, particularly with how quickly this method dried fresh basil.
- Less Space: Using an air fryer requires less space compared to other drying methods due to the compact nature of most air fryers.
- Even Drying: Another benefit of using an air fryer is the even drying achieved through convection. Most air fryers circulate hot air around the food, ensuring consistent heat distribution. This helps prevent uneven drying and ensures that all parts of the basil leaves are dried evenly.
Process to Dry Basil in an Air Fryer
If your air fryer has a dehydrator mode, utilize that function of your air fryer according to the manufacturer’s instructions to dehydrate basil. However, not all air fryers come with this feature. In such cases, follow these steps:
- Rinse basil leaves: Prepare your fresh basil by washing it thoroughly and removing any damaged leaves.
- Pat the leaves dry gently with a paper towel.
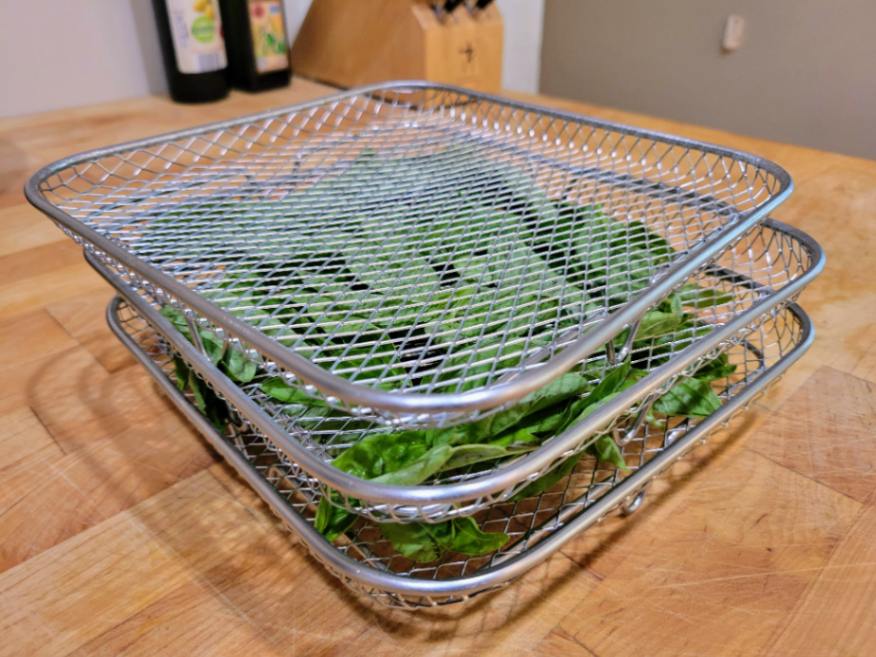
- Place the prepared herbs in contained trays or baskets inside the air fryer so they don’t fly around and come into direct contact with the heating elements due to convection.
- Dry herbs for 15-20 minutes: When using an air fryer without a dehydrator mode, set it at its lowest temperature setting (usually around 170°F / 76°C) and let it run for 15-20 minutes. It’s important to check the herbs often to prevent them from over-drying or burning.

5) How to Dry Basil in a Microwave

Microwaving basil can be an incredibly fast method, although there will potentially be a loss in taste, quality, and nutritional value.
To use this method, prepare basil for drying as indicated above. Make sure you have freshly washed and thoroughly dried basil leaves before proceeding.

- Microwave small batches: It is important to work with small batches of basil leaves to ensure even drying. Place a handful of leaves on a microwave-safe plate or paper towel.
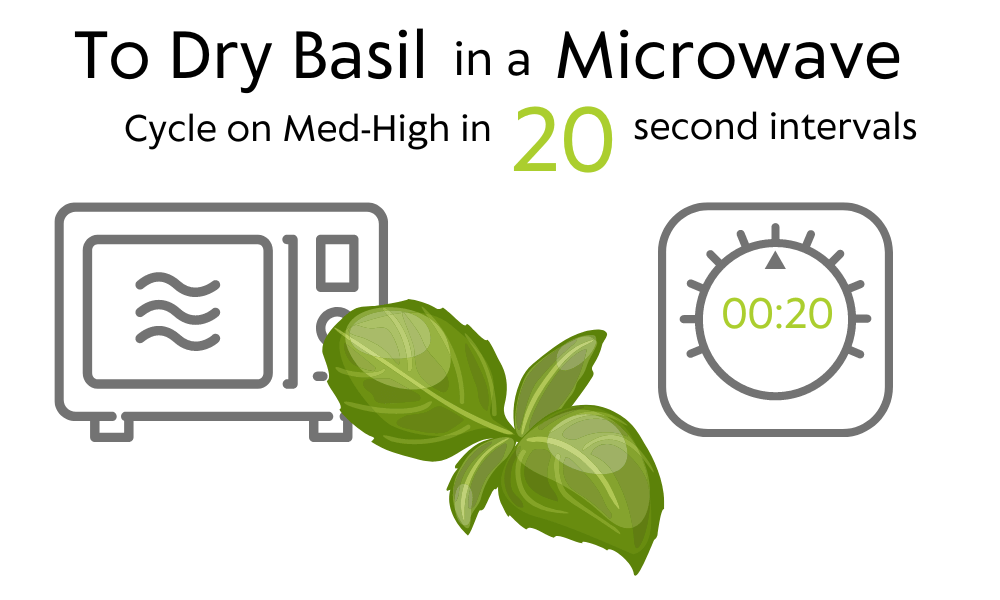
- Set the power settings: Use medium-high power settings on your microwave for optimal results. This will prevent the leaves from getting burnt or turning soggy.
- Time intervals: Microwave the basil in 20 second intervals. This allows for better control over the drying process and reduces the risk of overcooking.
- Check for brittleness: After each interval, carefully touch the leaves to check their dryness level. When they become brittle and crumble easily, they are ready.
- Multiple cycles: The drying process may require 4 or 5 cycles in total (80-100 seconds), depending on the moisture content of the basil leaves and your microwave’s power output.
It’s important to note that microwaving basil results in fairly significant loss of both flavor and aroma compared to other drying methods like air-drying or using a dehydrator. However, if time is limited or you need dried basil quickly, this method can be quite convenient.

What is the Best Way to Dry Basil?
I conducted an experiment to find the best way to dry basil to best preserve its aroma and taste, testing five different methods: air drying, using a food dehydrator, an oven, an air fryer, and a microwave. I also conducted a small survey among friends and family to gauge the intensity and quality of aroma and flavor in the dried basil samples, acknowledging that these aspects are somewhat subjective. The results were both surprising and informative.
The Results: Unexpected Winners
After drying basil using these five different methods and gathering feedback from my taste-testing panel, the results were in. Along with the food dehydrator, the air fryer emerged as the unexpected champion in terms of both aroma and flavor preservation. These two methods consistently scored well across the board, showcasing their ability to maintain the essence of basil even after drying.
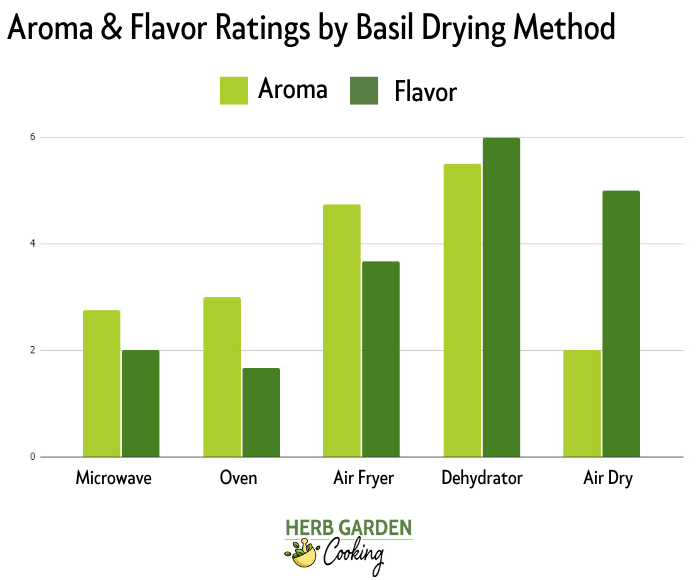
Air drying, although scoring well in terms of flavor, fell short when it came to preserving the aromatic qualities of basil. The process of air drying, while traditional, also takes significantly longer compared to the other methods.
On the other hand, the microwave and oven methods did not perform as well as anticipated. They scored lower in terms of both aroma and flavor. It appears that these methods might not be the best choice for basil aficionados.
| Microwave | Oven | Air Fryer | Dehydrator | Air Dry | |
| Aroma | 2.8 | 3.0 | 4.8 | 5.5 | 2.0 |
| Flavor | 2 | 1.7 | 3.7 | 6.0 | 5.0 |
Recommended Drying Methods for Basil
Based on the scores and considering the time requirements, the air fryer method emerged as a standout option for drying basil. It provided a quick and efficient way to preserve both the aroma and flavor. If you’re in a hurry or simply want a reliable method, the air fryer is your go-to choice.
If you have more time and are looking for the best flavor retention, the food dehydrator is clear choice for drying basil. It may take a bit longer, but the results are worth the wait, with basil that bursts with flavor in every dish.
I wouldn’t recommend air drying unless you have a lot of time on your hands. It’s a slow process, and the preservation of aroma leaves much to be desired. Finally, when it comes to the oven and microwave, it’s best to steer clear if you want to preserve basil’s distinct aroma and flavor.
How to Store Dried Basil
Proper storage techniques are crucial. By following these simple tips, you can ensure that your herbs remain fresh and potent for an extended period.
Use airtight containers to keep out moisture and maintain the herb’s overall quality. Suitable options include:
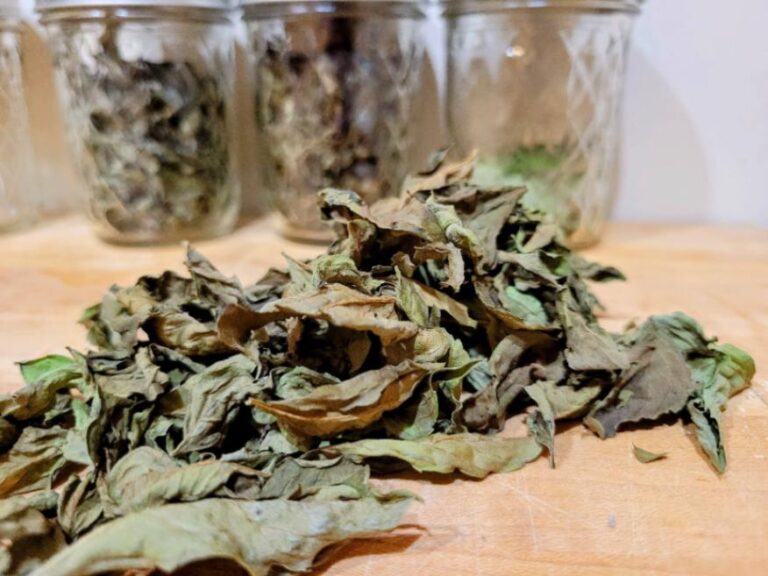
- Glass jars with tight-fitting lids: These containers provide excellent protection against moisture while allowing you to see the contents easily.
- Resealable plastic bags: If using bags, squeeze out as much air as possible before sealing them tightly.
- Metal tins or canisters: These sturdy containers offer durability and effective preservation.
Make certain to label and date your containers to maintain freshness, potency, and to ensure easy identification of your herbs.
Shelf Life of Dried Basil
While dried basil won’t spoil like fresh herbs, its flavor and potency will gradually diminish over time. Properly stored, dried basil can retain its flavor for up to one year, although it’s best used within the first 6 months.
It’s important to regularly check your dried basil for signs of mold or spoilage. If there are any signs of these, it’s important to discard it immediately.
Using Dried Basil: Tips and Ideas
Dried basil is a versatile herb that can add a burst of flavor and aroma to your favorite recipes. When you have a jar of dried basil in your pantry, there are countless ways to use it in the kitchen.
- Salad Dressing: A quick way to use dried basil in your cooking is by adding it to homemade salad dressings. Just a teaspoon or two can give your salad an extra boost of flavor.
- Soups and Stews: Whether it’s minestrone or vegetable soup, a teaspoon of dried basil can bring depth and complexity to your broth.
- Roasted Vegetables: Toss your favorite veggies with olive oil, salt, pepper, and a pinch of dried basil before roasting for an extra layer of flavor.
- Meat Rubs & Marinades: You can mix dried basil with other herbs like oregano, thyme, garlic powder, and onion powder to make tasty spice blends for meat rubs or marinades. This blend will make grilled chicken or roasted vegetables taste even better.
- Classic Italian Pasta Sauce: Add a tablespoon of dried basil to your tomato-based sauce recipes for an authentic Italian flavor.
- Homemade Pizza: Sprinkle some dried basil on top of your pizza before baking to enhance its taste.
Conclusion
In the pursuit of mastering the craft of drying basil, you gain the power to harness its concentrated essence and bring the vibrancy of fresh herbs to your kitchen year-round. Whether you opt for air drying’s simplicity, the precision of a dehydrator, the controlled environment of an oven, the efficiency of an air fryer, or the speed of a microwave, each method bestows a unique flavor profile upon your basil. Embrace the method that suits your style, and savor the joys of enhancing your dishes with the rich, aromatic touch of dried basil.
Frequently Asked Questions (FAQs)
How long does it take to dry basil?
The time it takes to dry basil varies depending on the method used. Air drying basil typically takes 2-4 weeks, while using a dehydrator can take 12-24 hours. Drying basil in an oven usually takes 45 minutes to 2 hours at low temperatures, whereas using an air fryer can yield results within 15 minutes.
Can I dry basil without any special equipment?
Air-drying basil requires no special equipment. Simply gather bunches of fresh basil leaves, tie them together with string or rubber bands, and hang them upside down in a well-ventilated area for 2 to 4 weeks.
Will dried basil retain its flavor?
If stored correctly in an airtight container away from light and moisture, dried basil can retain its flavor for up to one year. For maximum aroma and flavor, however, it’s best to use dried basil within the first 6 months after drying.
Can I use dried basil as a substitute for fresh basil in recipes?
Fresh basil offers a more vibrant flavor profile, but dried basil can be used as a substitute when fresh basil is not available. Keep in mind that dried basil is more potent and has a more savory flavor than fresh basil, so use it sparingly and adjust the quantity to taste.
Last Updated on 13 October 2023 by Bob Lee