

This post may contain affiliate links which means I may receive a commission for purchases made through links. I only recommend products that I have personally used. As an Amazon Associate I earn from qualifying purchases. Learn more on my Private Policy page.
Drying parsley is a simple yet rewarding process that allows you to preserve this versatile herb for extended use.
Before drying, wash off your parsley and pat it dry. Parsley can be dried using several different methods, including using a food dehydrator, at low temperature in an air fryer or oven, or air drying it by hanging bundles upside down. Dried parsley should be stored in an airtight container in a cool, dark place.
Let’s explore four different methods for drying parsley, each with its unique advantages and considerations.
Table of Contents
See my Comprehensive Guide to Parsley for a deeper dive into this aromatic herb.
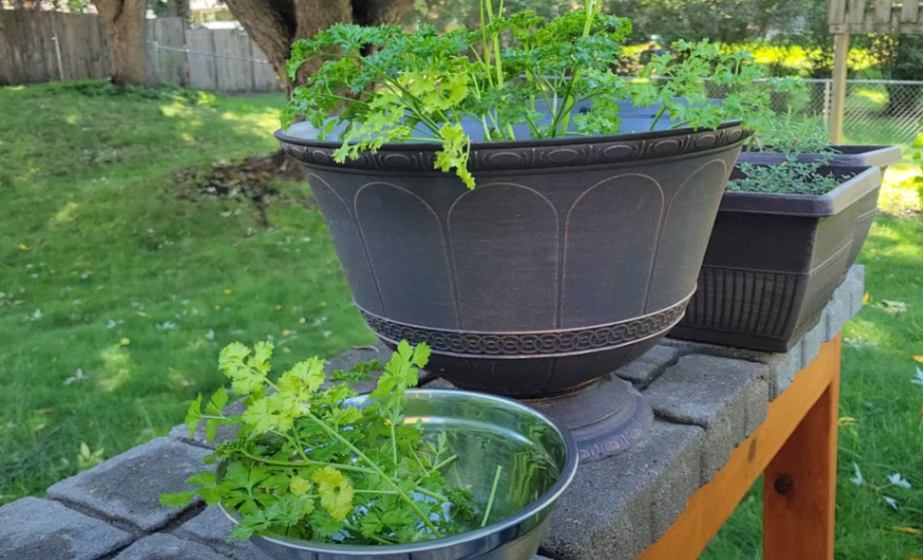
Prepare Parsley for Drying
Regardless of how you dry your parsley, the first step is to prepare your freshly harvested parsley for the drying process. Before we begin, it’s important to wash any dirt, debris, or insects off of your parsley.
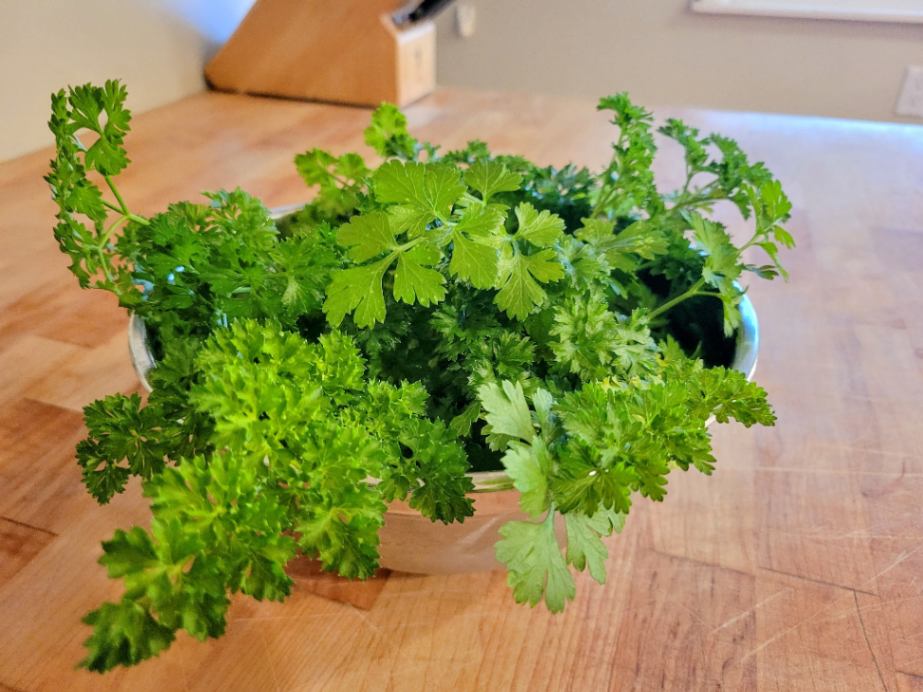
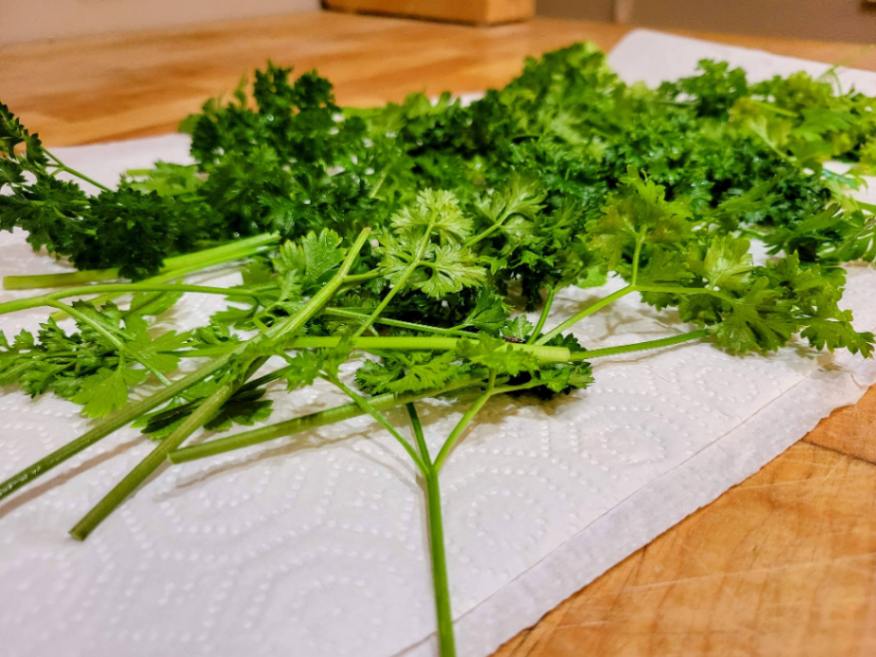
Just give it a good rinse in a colander and then lay out your parsley to dry on a kitchen towel or on paper towels. Pat it dry to remove any excess moisture, then let it sit out to dry off completely.
See my article on harvesting parsley to learn the best harvesting methods and techniques.
Drying Parsley with a Food Dehydrator
Using a food dehydrator is a very effective method for drying out your parsley. While it can take a little longer than other methods, it’s excellent for retaining parsley’s flavor, color, and aroma.
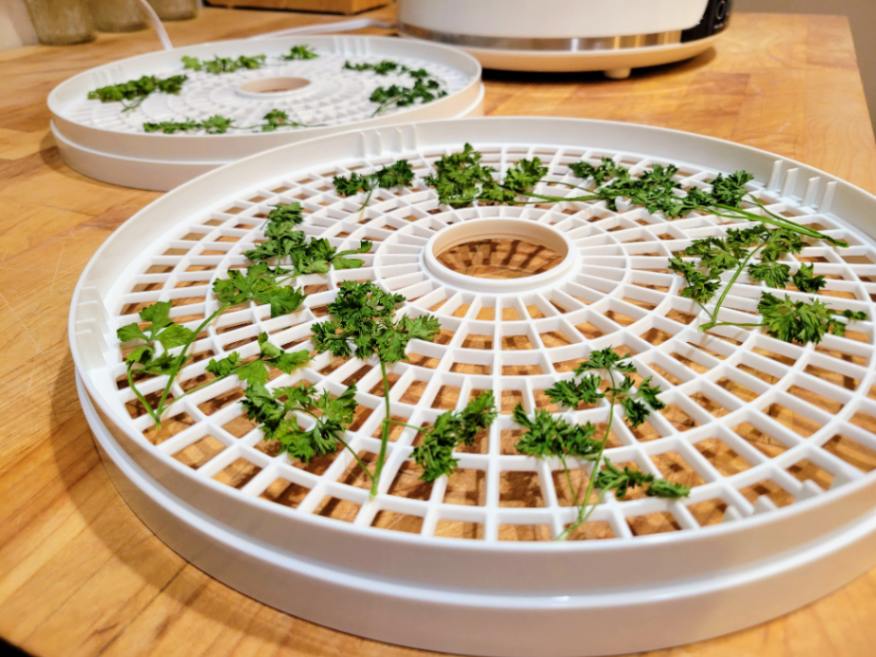
1) Lay Parsley Out Evenly on Dehydrator Trays
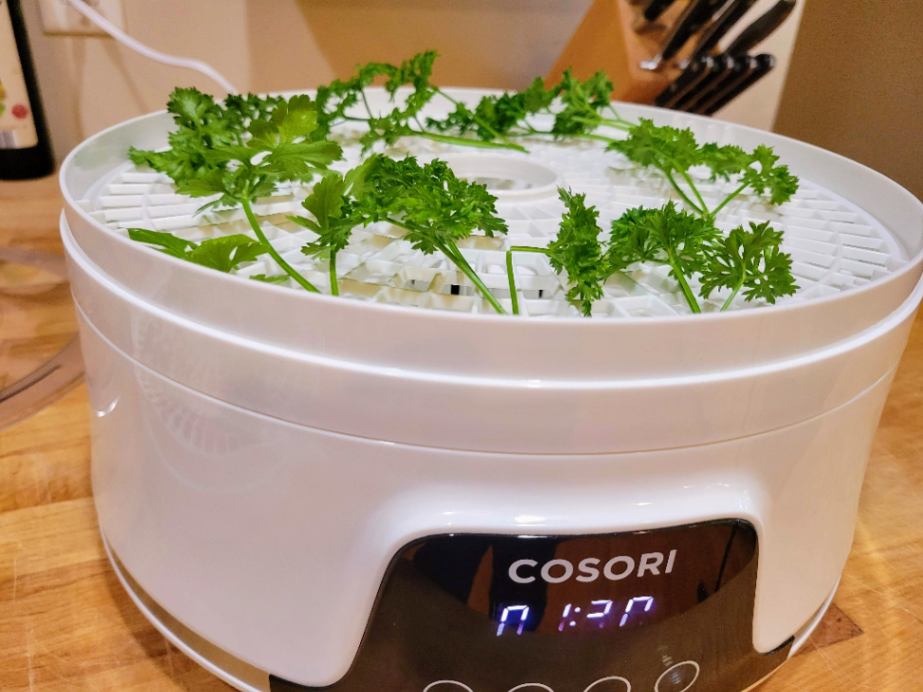
To dry parsley using a food dehydrator, lay the leaves out evenly on the dehydrator trays. Ensure the leaves do not overlap, as this will allow for proper air circulation during the drying process. By arranging the leaves in a single layer, you can help to facilitate even drying and prevent any moisture from getting trapped.
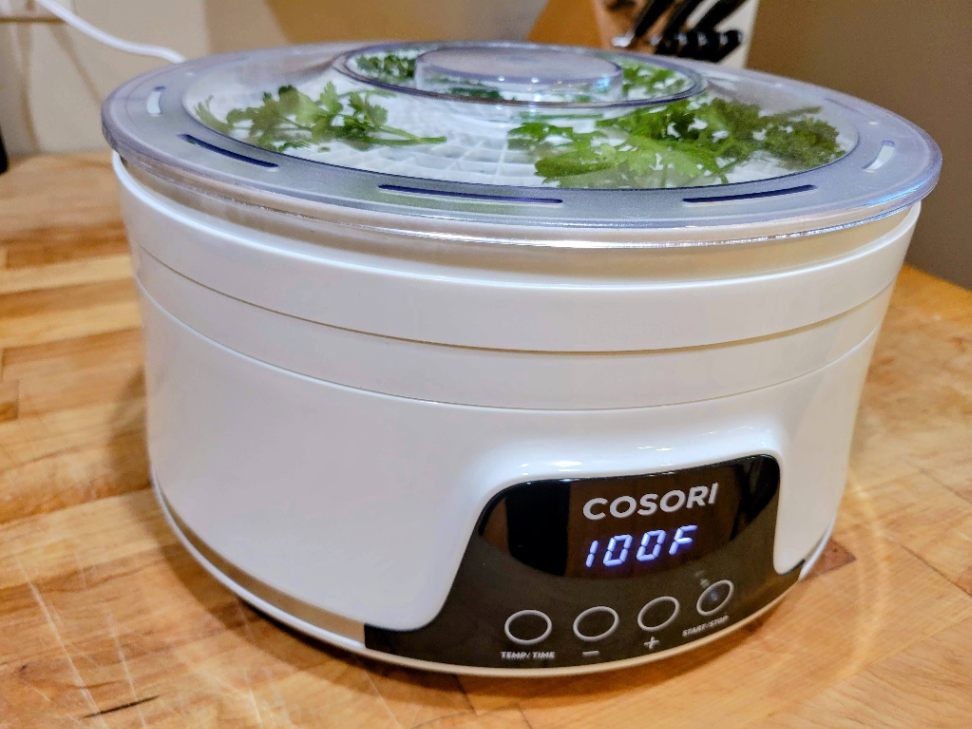
2) Set the Dehydrator Temperature to 100°F
For optimal results, I recommended setting the temperature of your food dehydrator to around 100° F (38° C). Temperatures between 95 and 105° F (35-40° C) are ideal for gentle drying without exposing the parsley to excessive heat that could potentially degrade its flavor or nutritional value.
3) Dehydrate Parsley for 14 to 15 Hours
After setting the temperature, let the food dehydrator do its things and allow the parsley leaves to dry for approximately 14 to 15 hours. The exact drying time may vary depending on factors such as humidity levels and the volume of parsley. It’s important to check periodically throughout the process to ensure that the parsley is drying evenly and not becoming overly crispy.
4) Condition Parsley in Airtight Containers
Conditioning is a technique employed in food dehydration to enhance storage quality and minimize the chances of mold and spoilage by ensuring adequate moisture removal.
To condition your parsley, let it cool after dehydrating and place it in an air-tight container. Shake daily for 2 weeks, checking for condensation or spoilage. If condensation appears, re-dehydrate the herbs for several hours and repeat the conditioning process.
5) Store Dried Parsley
Once your parsley leaves are completely dried and conditioned, store your dried parsley in an air-tight container in a cool, dark place. Storing dried parsley in an airtight container helps preserve its freshness and flavor for an extended period. Be sure to label your containers with dates to keep track of their shelf life.
Pros and Cons of Dehydrating Parsley in a Food Dehydrator
Pros:
- Retains flavor: Helps to retain its natural flavor and aroma.
- Easy process: A relatively simple and straightforward process that requires minimal effort.
Cons:
- Initial investment: Purchasing a food dehydrator may require an initial investment. However, it can be a worthwhile long-term investment if you frequently dry herbs or other foods.
- Time-consuming: The drying process can take several hours, so planning ahead is important to allow enough time for the parsley to dry thoroughly.
Drying parsley with a food dehydrator is an efficient way to preserve it for future use. By following these steps and considering the pros and cons of using a food dehydrator, you can enjoy the convenience of having dried parsley readily available whenever you need it.
Air Fryer Method for Drying Parsley
Drying parsley can also be effectively done using an air fryer. This method allows you to quickly and efficiently dry your parsley.
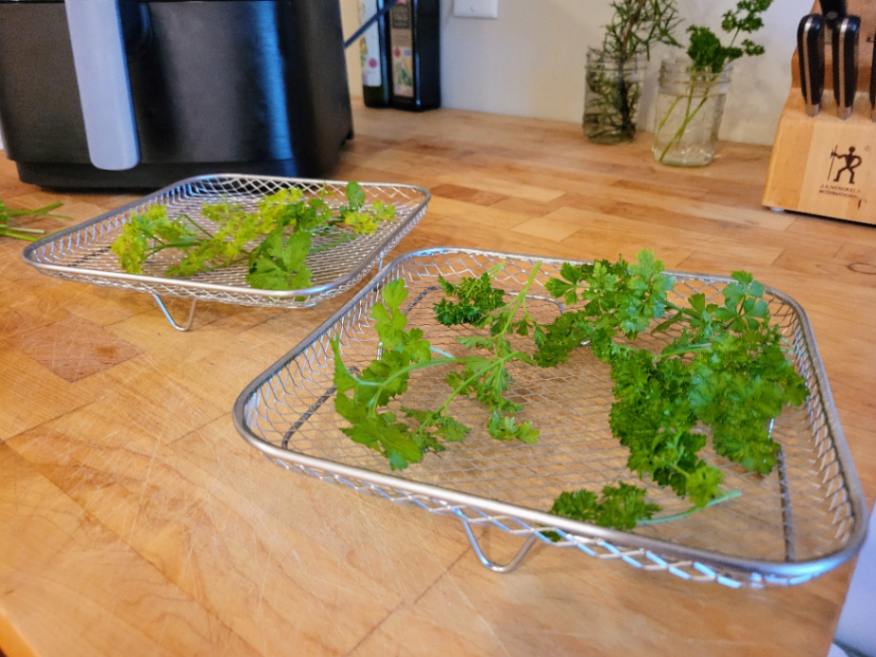
1) Lay Parsley in a Single Layer in Stackable Baskets
First, lay your parsley leaves out in a single layer in stackable air fryer baskets. I’ve found these Wire Air Fryer Baskets work perfectly for this purpose.
This arrangement prevents the herbs from flying around inside the air fryer. Air fryers work through the convection process that circulates hot air.
If you don’t contain your herbs, they could come into contact with the heating element in the air fryer, which wouldn’t be ideal. I put an empty basket on top of the herbs to fully contain them when they’re in the air fryer.
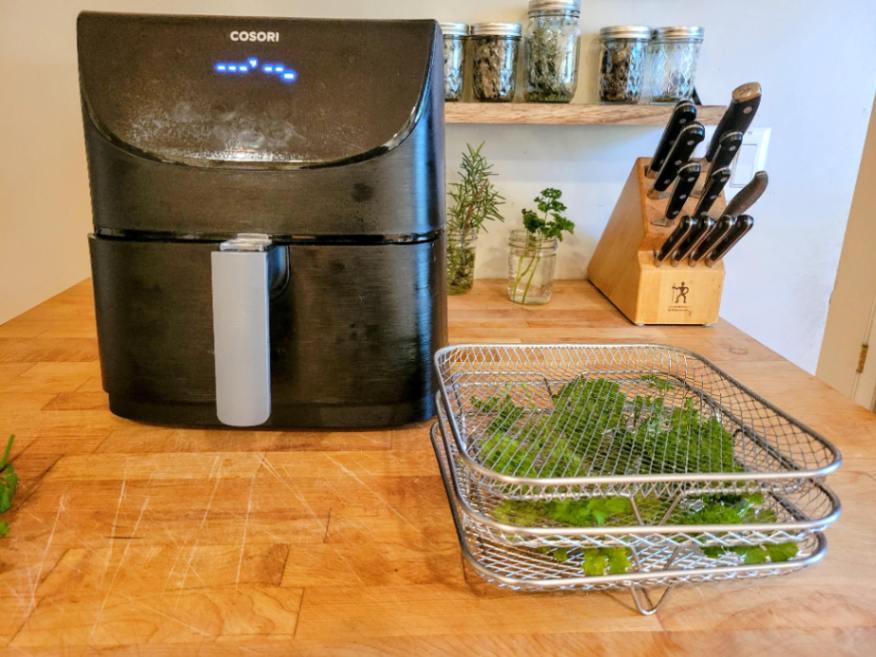
2) Load Herbs into Air Fryer and Set to Lowest Temperature
Once your parsley is arranged in the baskets, load them into the air fryer. Set your air fryer to the lowest temperature, which is typically around 170° F (77° C).
Some air fryers have a dehydrator mode available, which would be better to use if it is available. Gentle heat will help dry out the parsley without causing it to lose its vibrant green color or delicate flavor.
3) Set Air Fryer Time to 15-20 Minutes
Set the timer for 15 to 20 minutes. The exact drying time may vary depending on factors such as humidity levels and the thickness of your parsley leaves. Keep an eye on your herbs as they dry; they should become crisp and brittle when ready.
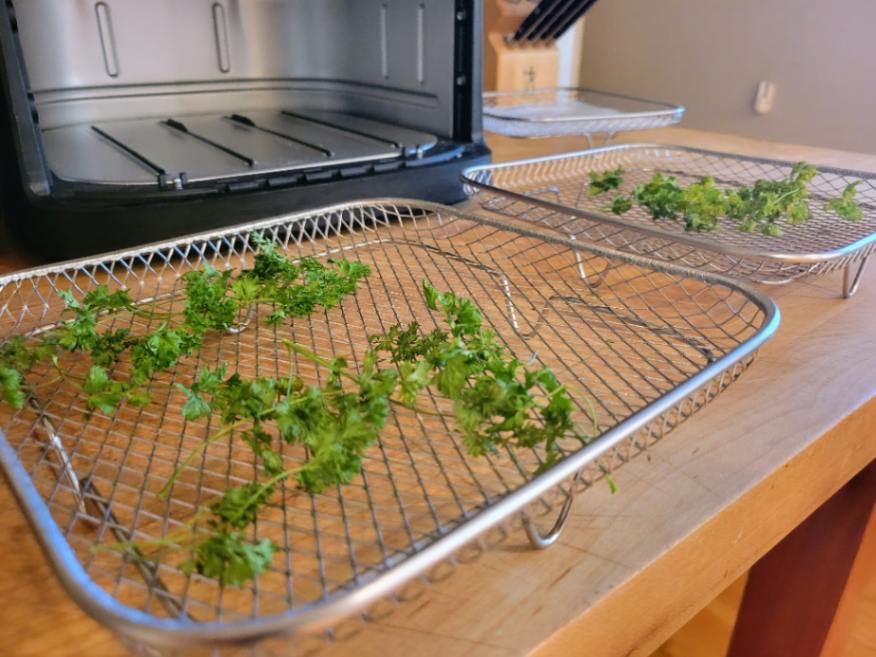
4) Let Baskets Cool and Separate Parsley Leaves from Stems
After drying, carefully remove the baskets from the air fryer and allow them to cool. Gently separate the dried parsley leaves from their stems. You can do this by lightly running your fingers along each stem, causing the leaves to fall off easily.
5) Store Dried Parsley in Airtight Containers
Transfer your dried parsley leaves into airtight containers such as glass jars or resealable bags to ensure long-lasting freshness. Make sure there is no moisture present before sealing them tightly. Storing them properly will help retain their flavor and aroma for future use.
Pros and Cons of Drying Parsley in an Air Fryer
Using an air fryer to dry parsley has its advantages and disadvantages.
Pros:
- Quick and Efficient drying process
- Flavor Retention: Retains the flavor, color, and aroma of the parsley
- Minimal Effort: Requires minimal effort and supervision
Cons:
- Limited Capacity depending on the size of your air fryer
- May Require Multiple Batches for larger quantities of parsley
- Noise: Can be noisy during operation
Drying parsley in an air fryer offers a quick and efficient way to dry it while maintaining its vibrant green color and delicate taste.
Air Drying Parsley
Air drying is a simple and traditional method for drying fresh parsley without needing any special equipment. This method preserves the herb’s flavor and color, making it popular among home cooks and gardeners.
1) Gather Parsley in Small Bunches
Start by gathering small bunches of clean, dry parsley stems to air-dry parsley. Make sure to remove any damaged or wilted leaves before proceeding. Once your bunches are ready, tie them together with string or rubber bands. This will help keep the parsley stems in place as they dry.
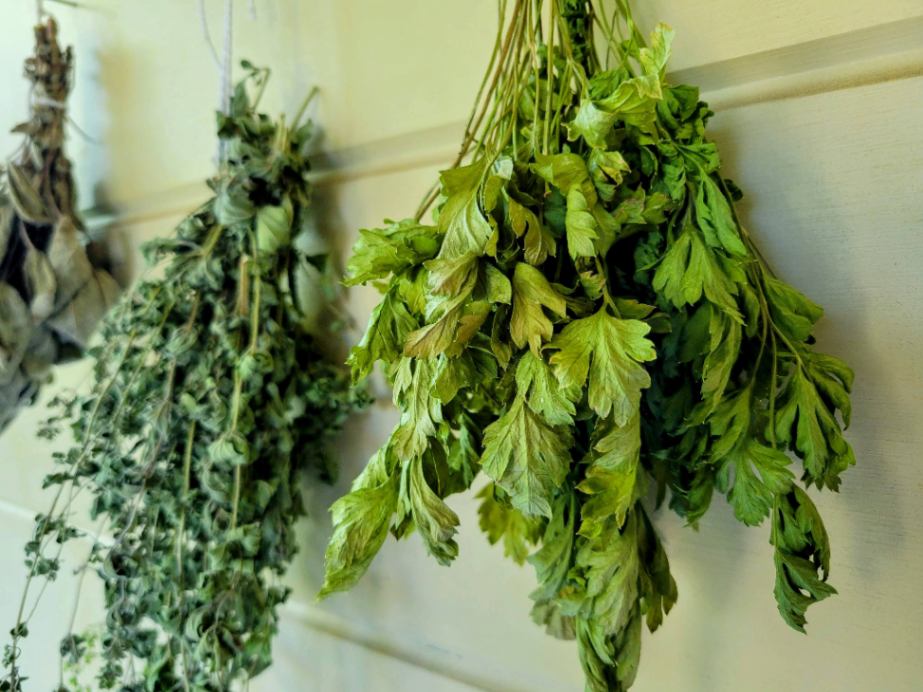
2) Hang Parsley Stems Upside Down in a Well Ventilated Area
Find a well-aired location away from direct sunlight to hang the bundles upside down. This could be in your kitchen or pantry, as long as there is good airflow. Avoid hanging them in areas with high humidity, as moisture can hinder drying.
3) Air Dry Parsley for 2-3 Weeks
Allow the parsley to hang undisturbed for 2-3 weeks until it is fully dried. The exact time may vary depending on factors such as humidity levels and thickness of the stems. It’s important to check periodically to ensure no mold or mildew has developed during drying.
4) Store in an Air-Tight Container
Once your parsley is fully dried, it’s important to store it properly to maintain its quality. Place the dried parsley in an airtight container, such as a glass jar or resealable bag, and store it in a cool, dry place.
Pros and Cons of Air Drying Parsley
Like any method, air-drying parsley has its pros and cons.
Pros:
- Minimal Effort and resources required. No need for specialized equipment or electricity
- Cost-Effective preservation method
Cons:
- Longer Drying Time compared to other methods
- Quality Loss: Potential loss of quality and color
- Mold Risk: Greater risk of mold and spoilage

Of the methods outlined here, air drying is the one I’d least recommend. I’ve found that air-drying parsley results in a fairly significant loss in quality and color compared to other methods. There is also a greater risk of spoilage using the air drying method.
Drying Parsley in an Oven
Using an oven is another viable option to dry parsley quickly without a dehydrator or air fryer. Here’s how you can do it:
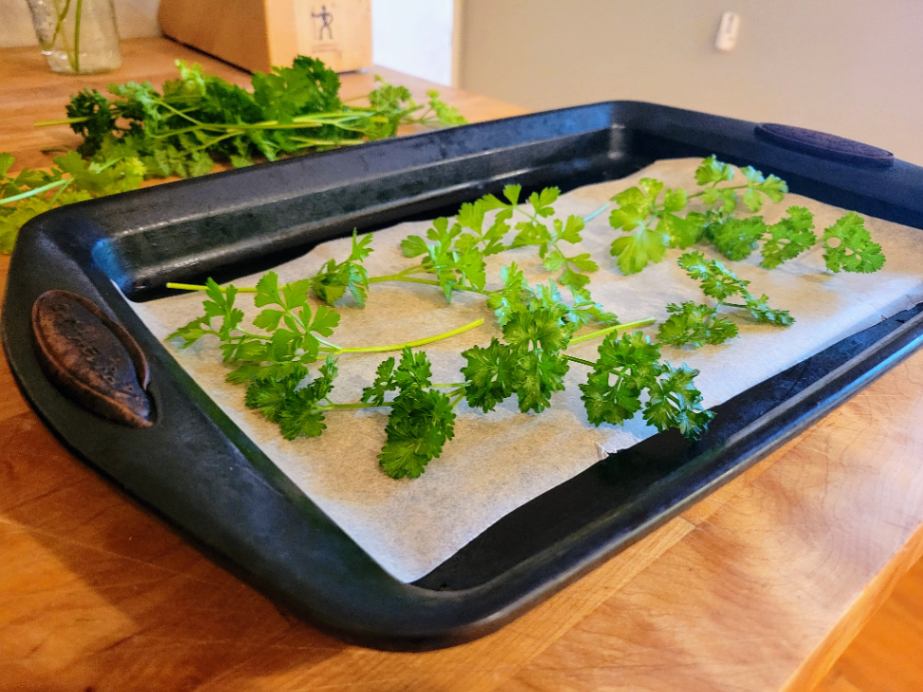
1) Spread Parsley Leaves on a Baking Sheet
After cleaning and thoroughly drying the parsley leaves, spread them evenly on a baking sheet lined with parchment paper. This will prevent the leaves from sticking to the sheet and make for easier cleanup.
2) Bake at Low Heat for Around 40 Minutes
Preheat your oven to its lowest temperature, probably around 170° F (77° C). Place the baking sheet with the parsley leaves in the oven and bake them for approximately 40 minutes. It’s important to check on them frequently to ensure they don’t burn. The goal is to achieve crispness while retaining their vibrant green color.
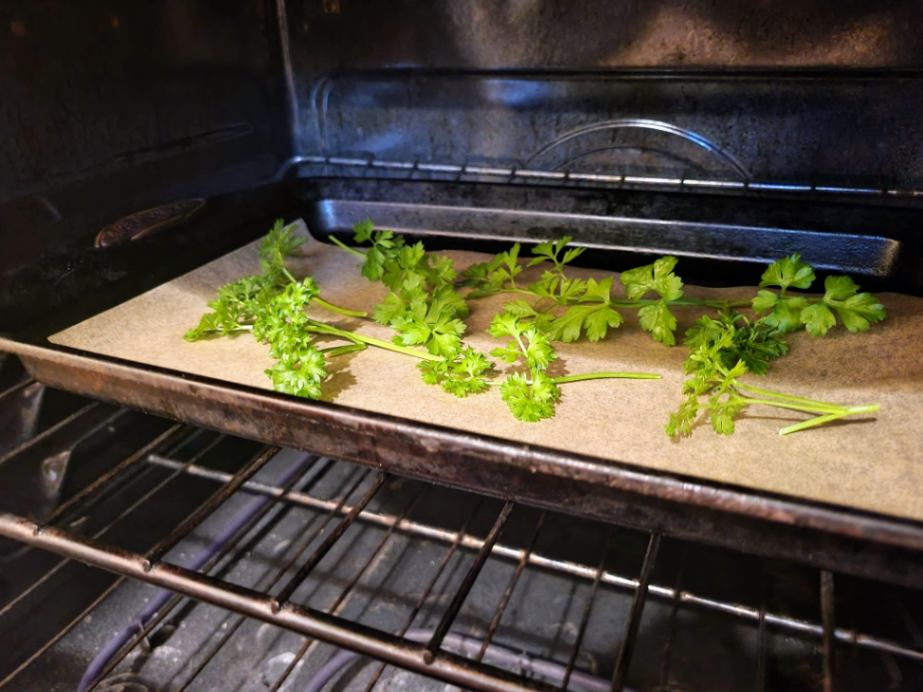
To facilitate proper airflow and ventilation during drying, slightly prop open the oven door. This will help moisture escape and prevent condensation from forming inside the oven.
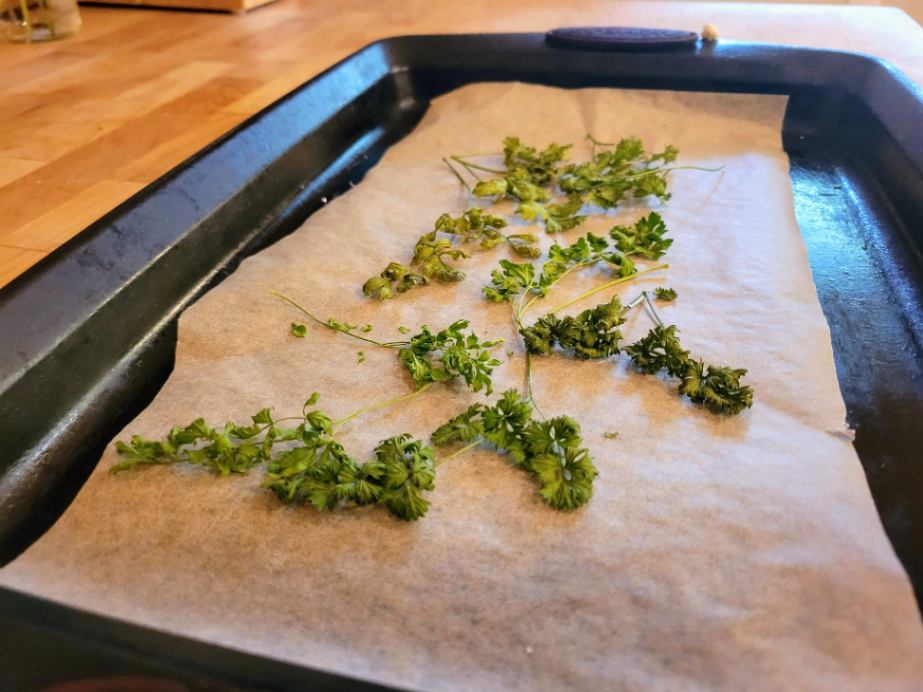
3) Store Parsley Leaves in Air-Tight Containers
Once your parsley leaves have dried, remove them from their stems carefully. Discard any discolored or wilted leaves before transferring them into air-tight containers for storage. Mason jars or sealable plastic bags work well for this purpose.
Pros and Cons of Drying Parsley in an Oven
Now that we’ve covered how to dry parsley in an oven let’s take a look at some pros and cons associated with this method:
Pros:
- Convenience: Convenient option if you don’t own a dehydrator or air fryer.
- Minimal Equipment: Requires minimal equipment – just an oven, baking sheet, and parchment paper.
Cons:
- Requires Monitoring: Requires frequent monitoring to prevent burning.
- Energy Requirements: May not be as energy-efficient as other methods.
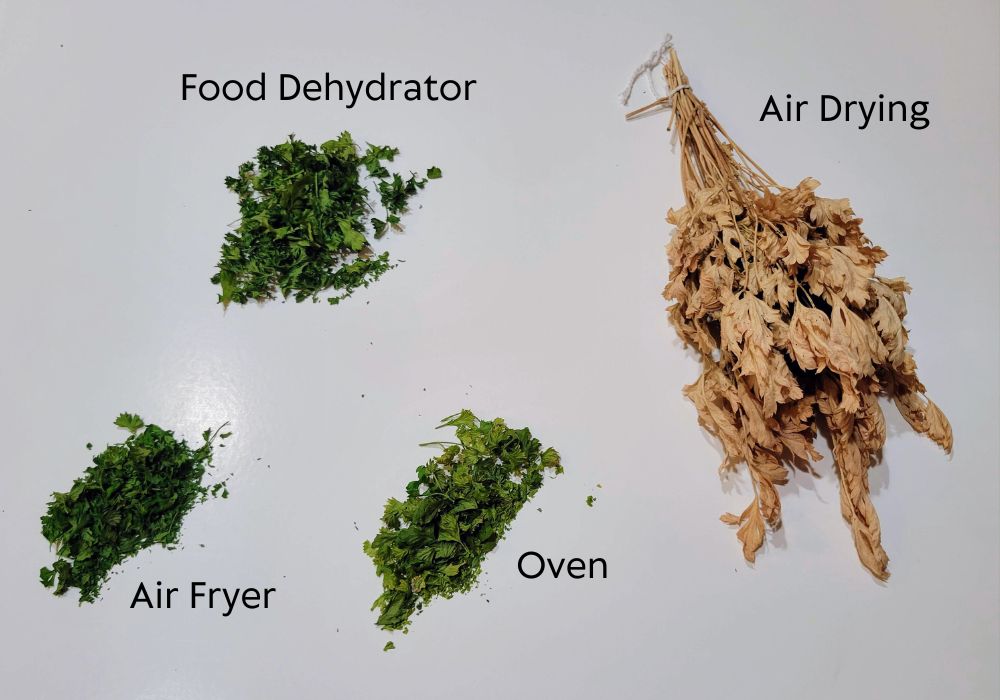
Comparison of Parsley Drying Methods
Drying parsley is a simple and effective way to preserve its flavor and extend its shelf life. With several drying methods available, each with its own advantages and disadvantages, let’s compare them to help you find your preferred method.
| Food Dehydrator | Air Fryer | Air Drying | Oven Drying | |
|---|---|---|---|---|
| Time Required | 14-15 hours | 15-20 minutes | 2-3 weeks | 40 minutes |
| Flavor and Aroma Preservation | Excellent | Good | Fair | Good |
| Effort Required | Low | Low | Minimal | Low |
| Equipment Needed | Food dehydrator | Air fryer, baskets | Twine, string, or rubber bands | Oven, baking sheet, parchment paper |
| Quality & Color Retention | Excellent | Excellent | Fair | Good |
| Spoilage Risk | Low | Low | High | Low |
Parsley Drying Method Comparison Analysis
- Time Required: The air fryer and oven methods are the quickest, with drying times ranging from 15 to 40 minutes, making them ideal for those looking for a fast solution. On the other hand, air drying and using a food dehydrator take considerably longer, with air drying being the most time-consuming.
- Flavor and Aroma Preservation: All methods excel at preserving the flavor and aroma of parsley, with minimal flavor loss. However, air drying may produce slightly lower quality and color than the other methods.
- Effort Required: The food dehydrator and air fryer methods require low effort and supervision during drying. Air drying is also straightforward but requires patience.
- Equipment Needed: Food dehydrators and air fryers require specialized equipment, while air drying and oven drying can be done with basic kitchen tools. This makes air drying and oven drying more accessible to those without specialized appliances.
- Quality & Color Retention: Food dehydrators and air fryers excel at maintaining parsley quality and vibrant green color. Air drying may result in fair quality and color retention, while oven drying falls in between.
- Spoilage Risk: Air drying carries a higher risk of mold development or spoilage due to its longer drying time and exposure to environmental factors. The other methods have lower mold risk if done correctly.
The choice of method for drying parsley depends on your specific needs and equipment availability. Food dehydrators and air fryers offer quick and efficient drying with excellent flavor and color retention but require specialized equipment.
For best flavor preservation, the food dehydrator likely wins out, but overall I’d say the air fryer method is probably the best method due to minimal time requirements and the high degree of quality preservation.
Air drying is cost-effective but time-consuming and carries a higher mold risk. Oven drying strikes a balance between convenience and cost-effectiveness. Consider your priorities, available equipment, and the quantity of parsley you need to dry when selecting the most suitable method for you.
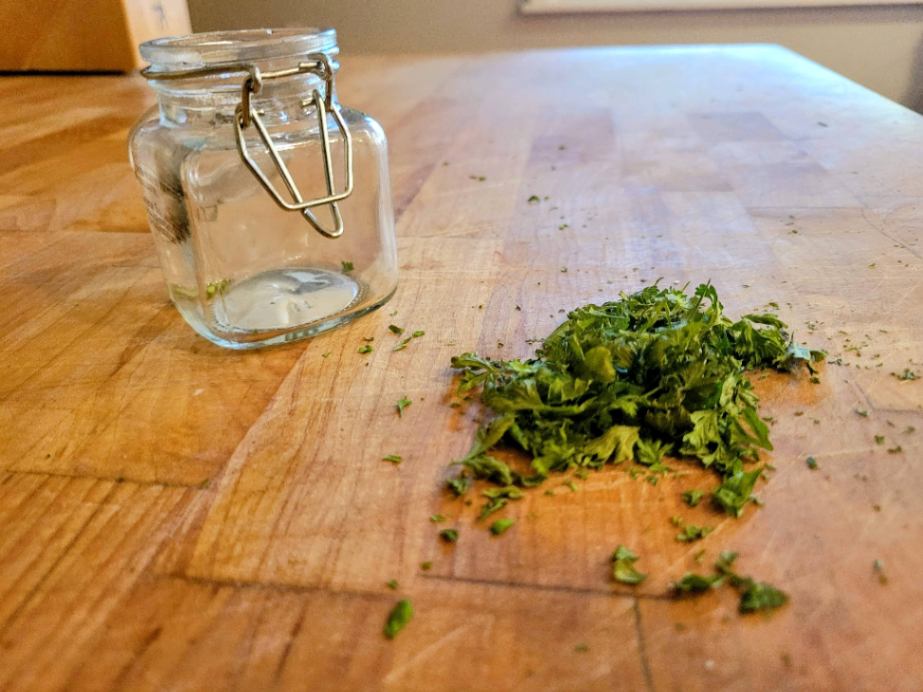
Proper Storage Techniques for Dried Parsley
Proper storage techniques are crucial to ensure the longevity and quality of your dried parsley. By following these guidelines, you can keep your dried parsley flavorful and fresh for an extended period.
Store in Airtight Containers
Using airtight containers is essential to prevent moisture, light, and heat from affecting the quality of the herb. Opt for glass jars with tight-fitting lids to maintain optimal freshness.
Label with Date of Drying
Labeling your containers with the drying date is a simple yet effective way to track the freshness of your dried parsley. This practice allows you to identify how long it has been since you dried the herb and helps you prioritize its usage accordingly.
Store Dried Herbs in a Cool, Dark Place
To preserve the flavor and potency of dried parsley, it’s best to store it in a cool and dark environment. Choose a pantry or cupboard away from direct sunlight or sources of heat. The cooler temperature will help maintain its freshness for an extended period.
By following proper storage techniques, you can store dried parsley for up to a year.
Avoid Crushing or Grinding Until Ready to Use
To retain the full flavor profile of dried parsley, I would try to avoid crushing or grinding the leaves until you’re ready to use them. This helps preserve their aromatic properties until they are incorporated into your dishes.
Properly storing your dried parsley maintains its flavor and ensures it remains safe for consumption. By implementing these storage techniques, you can enjoy the benefits of this versatile herb whenever needed.
Conclusion
You can choose from several effective methods for drying parsley based on your preferences and available resources. Whether you opt for a food dehydrator, air fryer, oven, or air drying, each technique has its advantages.
To ensure the longevity and flavor retention of your dried parsley, it is crucial to store it properly. Following proper storage techniques such as using airtight containers in a cool, dark place will help maintain its freshness for an extended period. By taking these steps, you can have a readily available supply of dried parsley.
For more information about parsley, check out my Comprehensive Guide to Parsley.
Frequently Asked Questions (FAQs)
How long does it take to dry parsley in an oven?
Drying parsley in an oven typically takes around 40 minutes at low heat (around 170°F or 77°C). Keep an eye on the leaves to prevent them from browning or burning.
Can I use dried parsley as a substitute for fresh parsley?
Dried parsley can be used as a substitute for fresh parsley in many recipes. However, remember that the flavor intensity may vary slightly between fresh and dried forms.
Is there any nutritional difference between fresh and dried parsley?
While some nutrients may be lost during drying, dried parsley retains many essential vitamins and minerals. It remains a valuable source of antioxidants like vitamin C and vitamin A.
Can I freeze freshly picked parsley instead of drying it?
Freezing freshly picked parsley is an alternative to drying. Chop the parsley into desired portions and place them in a freezer-safe container or bag. Frozen parsley can be used directly in recipes without thawing, but it may have a slightly different texture than dried parsley.
Last Updated on 25 October 2023 by Bob Lee