
This post may contain affiliate links which means I may receive a commission for purchases made through links. I only recommend products that I have personally used. As an Amazon Associate I earn from qualifying purchases. Learn more on my Private Policy page.
Cultivating herbs from tiny seeds can be rewarding and provide an abundance of fresh, aromatic herbs for the home cook. For those new to indoor herb gardening, the question of where to begin cultivating herbs from seed can be somewhat daunting.
To sow herbs indoors, pre-soak seeds to hasten germination. Fill starter trays with seed starting mix, sow the seeds, then cover them with plastic wrap. Place the seed starter trays in a warm, well-lit spot. Consider using grow lights and heating mats to enhance germination and maintain consistent moisture levels.
Let’s look at the best herbs to start indoors, what supplies you’ll need, and what it takes to grow herbs from seeds.
Table of Contents
Best Herbs to Grow from Seed
Most common garden herbs can be started from seed indoors. The following herbs are relatively easy to grow from seed indoors given the proper conditions:
- Basil
- Cilantro
- Parsley
- Dill
- Chives
- Mint
- Oregano
- Thyme
- Sage
- Rosemary
Herbs That Don’t Grow Well From Seed
On the other hand, several herbs can be more challenging when grown from seed. Herbs that you may want to avoid growing from seed include:
- Lavender: Can be slow to germinate and require specific conditions, including a period of cold stratification.
- French Tarragon: Can only be grown by cutting or by dividing. French tarragon flowers are actually sterile and cannot be sown from seed. Russian tarragon, on the other hand, can be grown from seed.
- Cumin: While technically a spice as opposed to an herb, cubin can take a long time to mature from seed. It’s more commonly grown from transplants.
Herb Seed Starting Supplies
Before starting herb seeds indoors, it’s important to make sure you have the proper equipment.
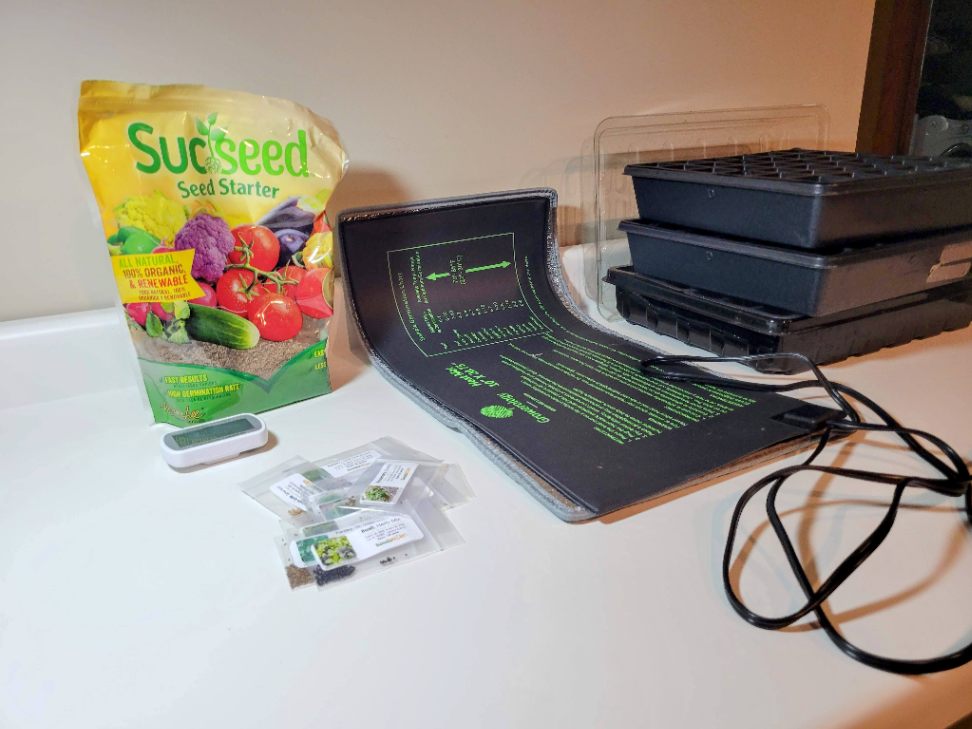
Some of the essential supplies you’ll need include the following:
- Seed Starter Trays: It’s best to start your seeds in these shallow, multi-compartmental trays designed specifically for germinating and growing plants from seeds. They provide an organized and controlled environment that makes it easier to manage and transplant seedlings as they grow.
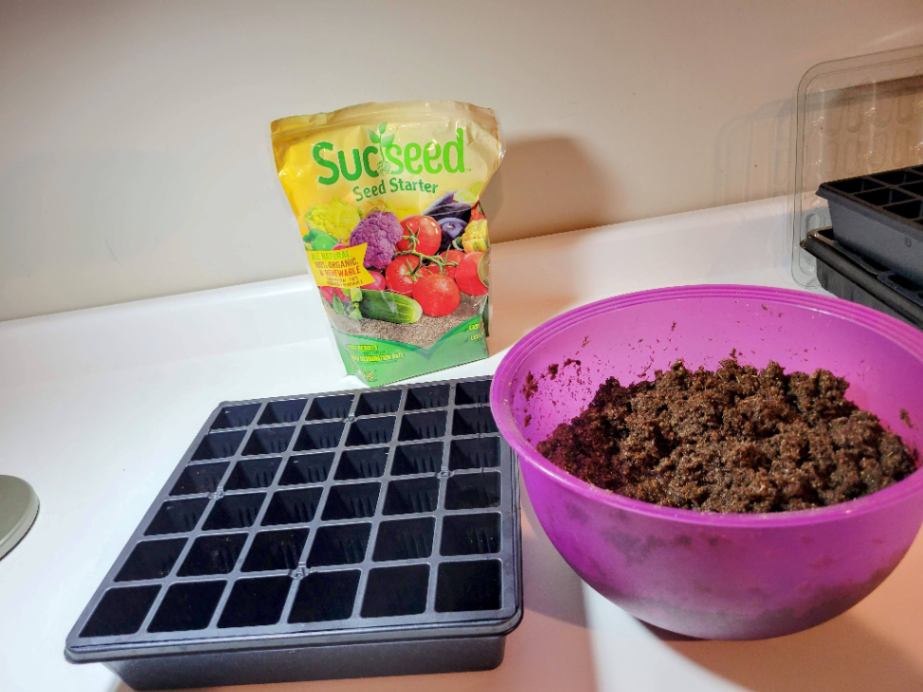
- Seed-Starting Mix: Use a seed-starting mix instead of regular potting soil. Seed-starting mixes are lighter and airier than soil, giving seedlings an optimal growth environment. I prefer to use Mosser Lee SucSeed Seed Starter (Amazon).
- Seeds: Purchase high-quality seeds from trustworthy suppliers to ensure your herbs get off to a good start. I get most of my herb seeds from SeedsNow, as I’ve found their seeds to be of high quality with good germination. Always pay attention to the expiration date, as seeds lose viability with age.
- Seedling Heat Mat: These heat mats provide controlled warmth to your seed starter trays, promoting faster and more uniform seed germination.
- Labels and Markers: When cultivating various types of herbs, using labels helps to eliminate confusion. Write down the herb name and sowing date to monitor your herb growth. Plastic labels or popsicle sticks paired with a waterproof marker can make for durable DIY plant labels.
- Containers and Pots: If you plan to grow your herbs indoors after transplanting the seedlings, the pots you choose should allow for sufficient root depth of your herbs. 6-8″ pots should typically be used for growing herbs indoors, although herbs like rosemary or mint may need deeper ones. Your pots must have drainage holes to prevent root rot.
- Watering Can or Spray Bottle: Consistent moisture is required for herb seedlings to germinate, so use a watering can with a fine spout or a spray bottle to keep them hydrated.
- Light Source: Newly planted herb seeds require at least 12 hours of light for proper germination. 14-16 hours would be even better. LED and fluorescent grow lights work well for this purpose and ensure even light distribution. Use a timer for consistency.
Should You Soak Herb Seeds Before Planting?
Boosting the germination of herb seeds plays a crucial role in getting your herb garden off to a strong start. One effective method is soaking herb seeds in water before planting.
Soaking herb seeds in water before sowing can accelerate germination. Tender herbs like parsley and cilantro benefit from soaking for around 24 hours. Dill and rosemary can be soaked for around 4 hours before planting. This pre-soaking process expedites the emergence of many herb varieties.
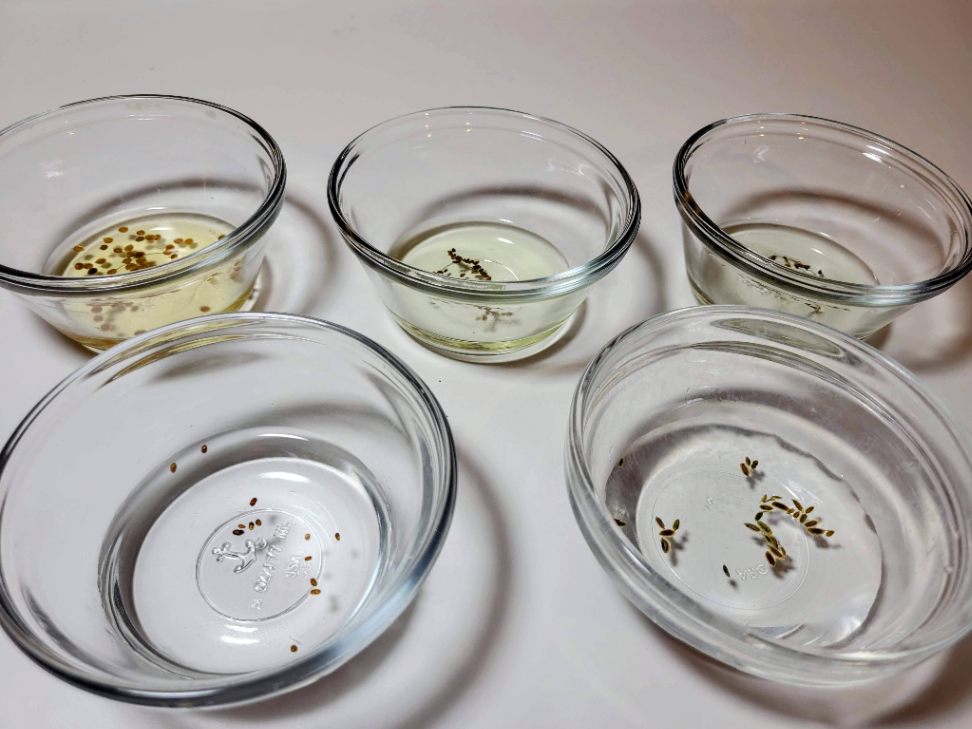
Soaking works particularly well for speeding up germination on seeds with a tough outer shell. Soaking these seeds in water will soften the outer seed coat and enhance germination.
| Herb Name | Time to Soak |
|---|---|
| Basil | Optional |
| Cilantro (Coriander) | 24 hours |
| Dill | 2-4 hours |
| Fenugreek | 12-24 hours |
| Parsley | 24 hours |
| Rosemary | 4-6 hours |
How to Sow Herb Seeds Indoors
To begin sowing your herb seeds indoors, follow this process step-by-step:
1) Soak Herb Seeds Prior to Sowing
If desired, you can soak your herb seeds to help speed up the germination process. This step is optional, but it can help the germination process for several herbs. If you want to soak your herbs, look at the soak time guidelines for specific herbs I referenced in the preceding section.
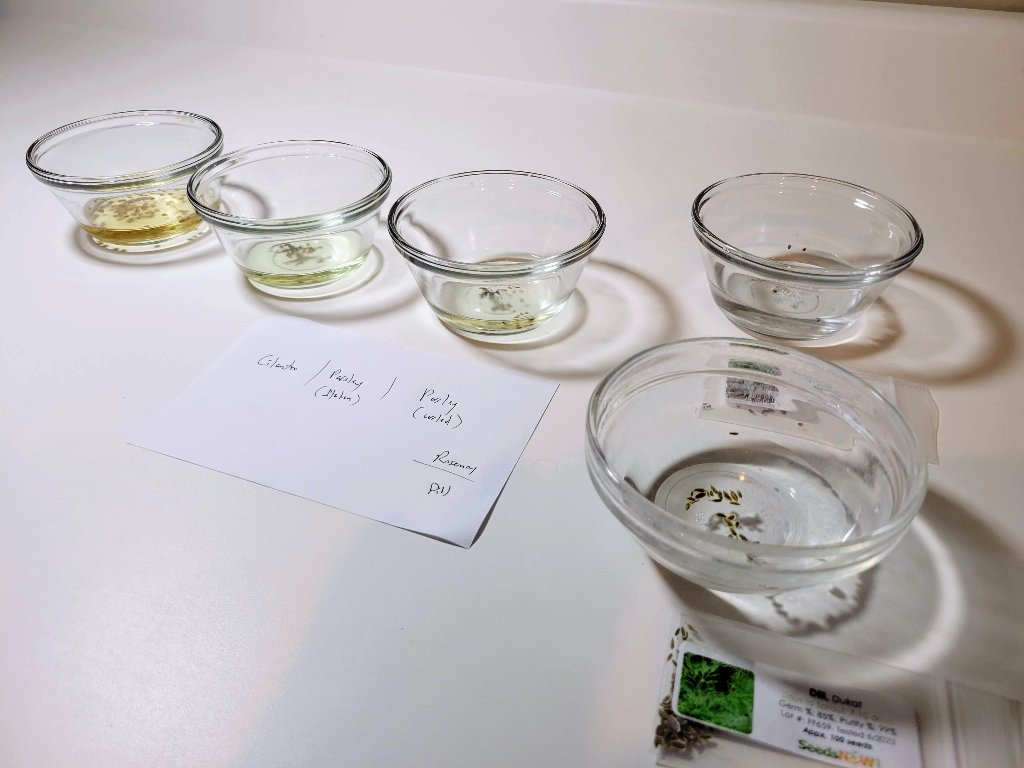
Always soak different types of herbs in different containers when soaking your herb seeds. It’s also critical to make labels or take notes indicating which herbs are which. Herb seeds are typically very tiny and can be easily confused with one another, so make sure you’re keeping track of which seeds are which.
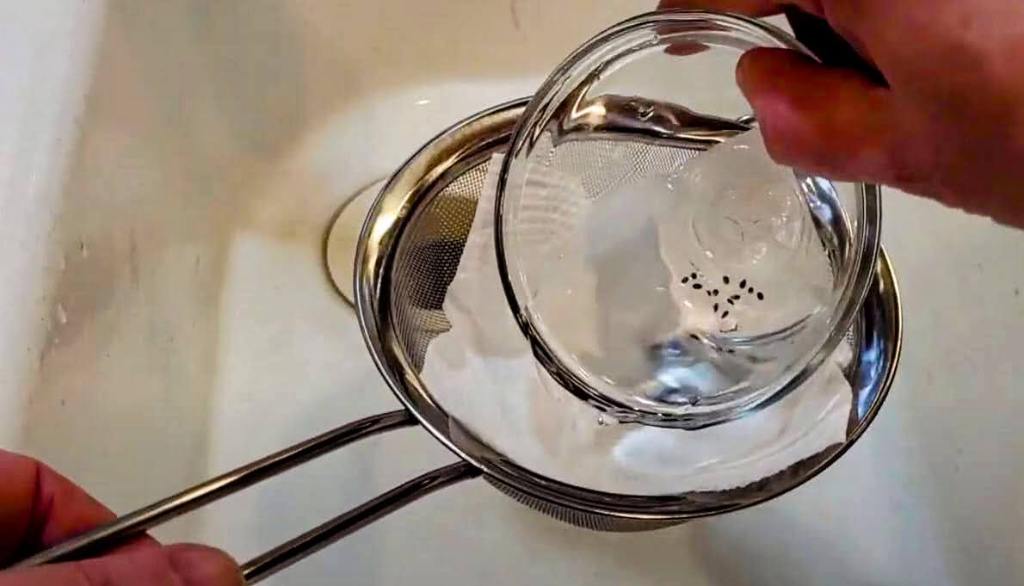
When your herbs have finished soaking, carefully drain them and let them dry. For very tiny seeds such as parsley, you may want to strain them through a paper towel so you don’t lose them when draining them from the water they’ve been soaking in.
2) Organize Seed Starting Supplies
Before you get started, make sure you have all of the supplies you need to sow your herbs, including seed starter trays, seed planting mix, herb seeds, and note-taking materials.
It’s extremely important to be organized as you begin sowing herb seeds so as not to lose track of what seeds you are planting and where you are planting them.
3) Fill Seed Starter Trays with Seed Starting Planting Mix
Prepare your seed starter mix if necessary. Many seed starter mixes require mixing the planting material with water. Once you have your seed starting mix ready, fill up the seed start trays with the planting mix to 1/4″ (0.6 cm) from the top. Make sure to push down the mix into the cells to fill up any air pockets that may have formed.
4) Sow Herbs Seeds in Seed Starter Trays
Next, sow seeds directly into the individual seed starter tray cells. Herb germination rates aren’t spectacularly high, so you’ll want to sow several seeds per cell. I typically sow a minimum of 3 or 4 seeds per cell. Most herb seeds require light to germinate, so they should be close to the surface, but follow the guidelines on your seed packets for planting depth of individual herbs.

Don’t forget to take notes on what you’re planting in your seed starter trays to maintain a clear record of the herbs you’ve sown in each cell. Organization is the key to keeping track of which herbs are planted where.

Sticking a label or some other marker in a specific corner of your seed starter trays is also helpful for reference. I always mark the top left cell of each planting tray to keep track of the tray orientation when moving them between locations.
5) Cover Starter Trays with Plastic Wrap or Domes
If you seed starter tray has a plastic dome, use it. This will help to regulate the temperature and moisture within your seed starter tray (Amazon) to help your seeds germinate.
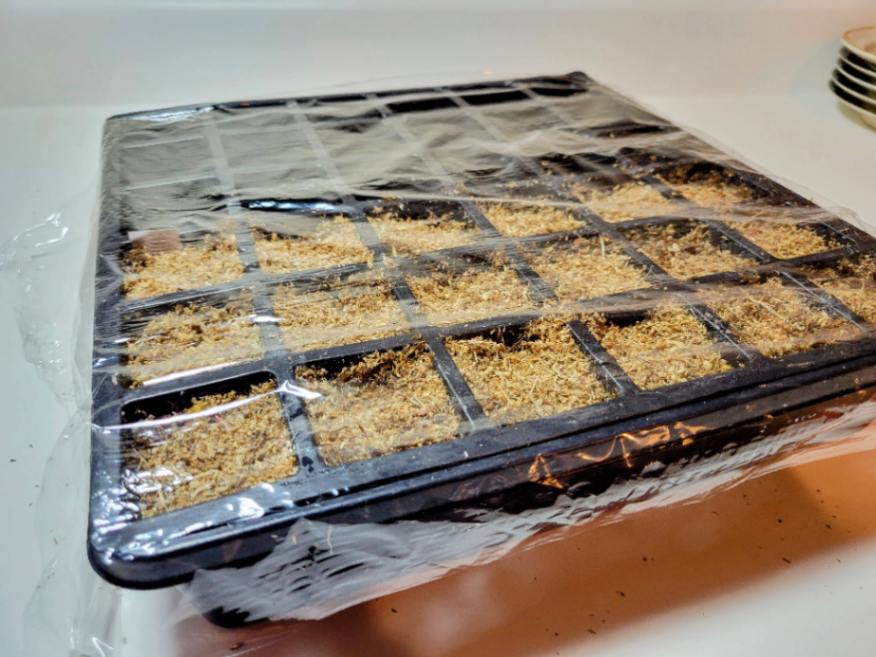
If your seed starter trays don’t come with domes, covering them with plastic wrap will server the same purpose.
6) Place Herbs in Warm, Well-Lit Place for Germination
Once you’ve sown your herb seeds, move your seed starter trays to a way location with lots of light. The ideal germination temperature for most herbs is between 70 and 75°F (21-24°C). Herb seeds require a good deal of light to germinate. If possible, your herb seeds should get between 14 and 16 hours of light per day to germinate.
Using grow lights on a timer and placing a seed starter heating mat under your seed starter trays will help provide optimal conditions for herb seed germination.
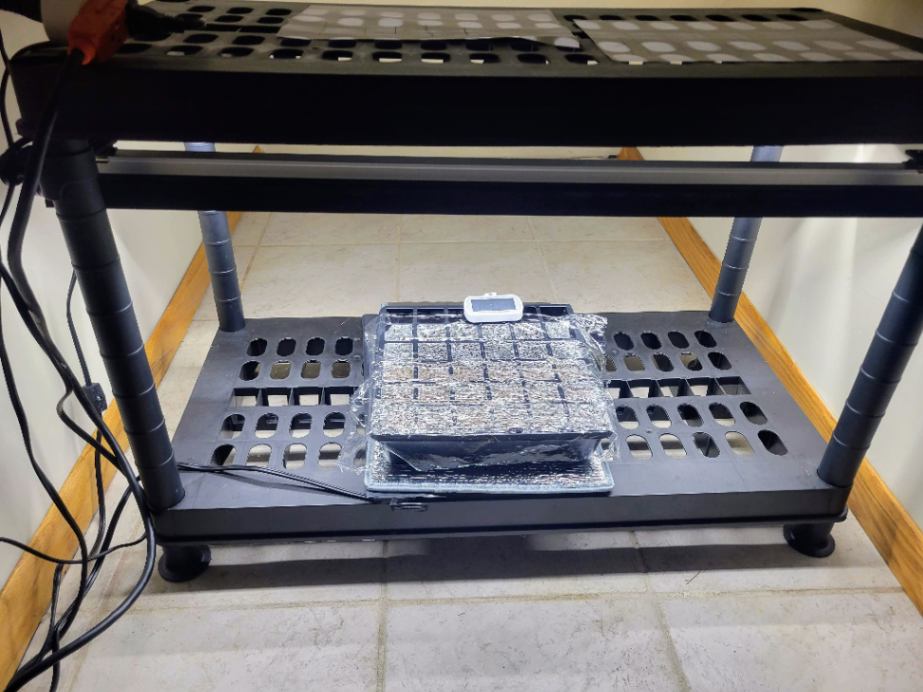
A digital thermometer that keeps track of min and max temperature can be very helpful to make sure your herb seeds are in a place with the appropriate temperature range. I use these digital refrigerator thermometers (Amazon) for this purpose. If your seeds are too hot or too cold, you may want to move them to a different location.
When to Start Herbs from Seeds Indoors
Now that we’ve looked at how to plant herbs from seeds indoors, the next question we’ll need to explore is when do you plant your herbs indoors. To answer this, we’ll need to factor in a couple of different things.
First, if you plan to grow herbs indoors, you can plant them at any time, so planting timing becomes a non-issue.
If you’re planning to transplant them to a location outside, however, the timing of when to plant your herbs will depend mostly on where you live and when the last frost date is in your location. You can look up your average first and last frost date on the Old Farmer’s Almanac website.
When you know your last frost date, you can use the guidelines below to determine how many weeks before your last frost date to sow specific herbs indoors and when to begin hardening off your herbs outside.
| Herb | Weeks to Start Before Last Frost | Days to Harden Before Transplanting |
|---|---|---|
| Basil | 6-8 | 7-10 |
| Chives | 8-10 | 7-10 |
| Cilantro | 6-8 | 7-10 |
| Dill | 4-6 | 7-10 |
| Mint | 8-10 | 7-10 |
| Oregano | 6-8 | 7-10 |
| Parsley | 8-10 | 7-10 |
| Rosemary | 8-10 | 14-21 |
| Sage | 8-10 | 14-21 |
| Thyme | 8-10 | 14-21 |
Hardening off is the process of gradually exposing herbs that you started inside to the outside environment before transplanting them. This basically requires moving them outside for short outdoor periods of time and gradually increasing the time they spend outside to acclimate them to the outdoor environment.
How Long Do Herb Seeds Take to Germinate?
| Herb | Germination Time (Days) |
|---|---|
| Basil | 5-10 |
| Chives | 10-14 |
| Cilantro | 7-14 |
| Dill | 7-14 |
| Mint | 7-14 |
| Oregano | 7-14 |
| Parsley | 14-21 |
| Rosemary | 14-21 |
| Sage | 14-21 |
| Thyme | 7-14 |
Transplanting Herb Seedlings to Larger Pots
Once your herb seedlings begin to develop, it’s time to start thinking about transplanting your herbs into larger containers. Once your herbs reach 2 to 3″ (5-8 cm) in height and have several sets of true leaves, you’ll want to transplant them into large containers. Transplant your herbs into pots that are 2-3″ larger than their current container size.
It’s important to transplant herbs into larger containers to ensure they don’t become root-bound, which can cause plant stress.
The best time to transplant your herbs will depend upon the herb type. Tender herbs like basil, cilantro, and parsley may be ready to transplant within 3 weeks of germination. On the other hand, hardier herbs like rosemary, sage, and thyme may not be ready for transplanting until 6 weeks or more after germination.
When up-sizing your herbs, keep your growing medium in mind. Dought-tolerant herbs such as rosemary, sage, and thyme require well-draining growing mediums. For more information on indoor herb-growing mediums, see my article on What is the Best Soil for Indoor Herbs.
Cultivating herbs from tiny seeds can be rewarding for home cooks and gardeners alike, providing a bountiful supply of fresh, aromatic herbs. With care and knowledge, anyone can enjoy growing herbs from seeds to enhance their culinary creations.
Last Updated on 27 April 2024 by Bob Lee