This post may contain affiliate links which means I may receive a commission for purchases made through links. I only recommend products that I have personally used. As an Amazon Associate I earn from qualifying purchases. Learn more on my Private Policy page.
Contrary to popular belief, repotting herbs does not require a green thumb. Any thumb, as long as it’s attached to a hand willing to get a little dirty, will do just fine. Knowing when and how to transplant your herbs ensures healthy plants and a rich harvest of herbs for cooking.
Transplant herb seedlings to bigger pots after one or more sets of true leaves appear. Avoid transplanting while herbs only have seed leaves (cotyledons), as this can stress them. Each herb variety has its own timeline; for example, basil and cilantro can be repotted after 3-5 weeks, while rosemary takes 8-10 weeks.
Keep reading to learn when to transplant herb seedlings for various types of herbs and what to look for before repotting young plants.
Table of Contents
Wait Until True Leaves Emerge
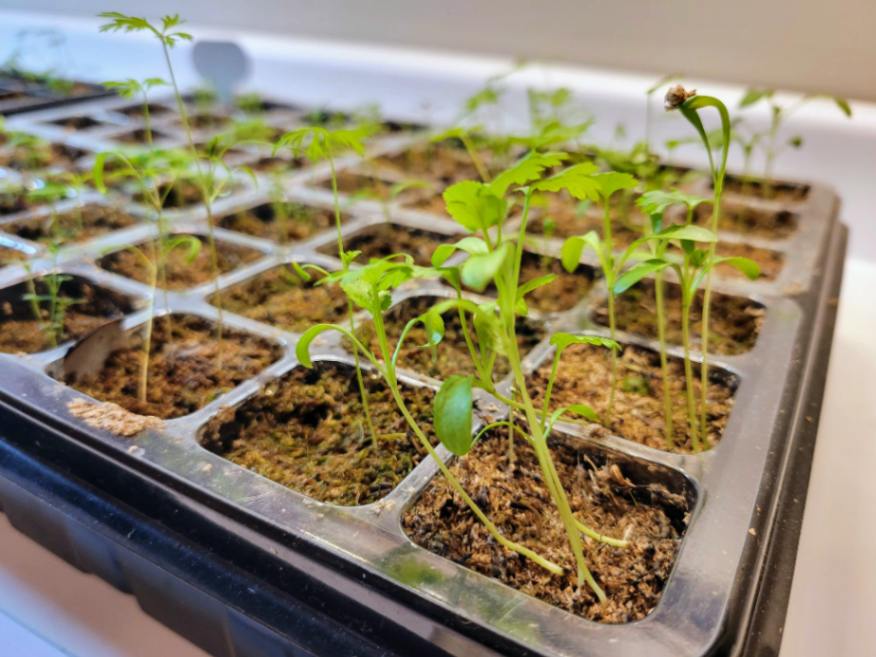
Understanding cotyledons and true leaves is essential for herb gardening. Cotyledons, the first leaves after germination, nourish the seedling. True leaves, which develop later, are crucial for photosynthesis. Identifying true leaf emergence is key to timely repotting for healthy herb growth.

Cotyledons vs. True Leaves
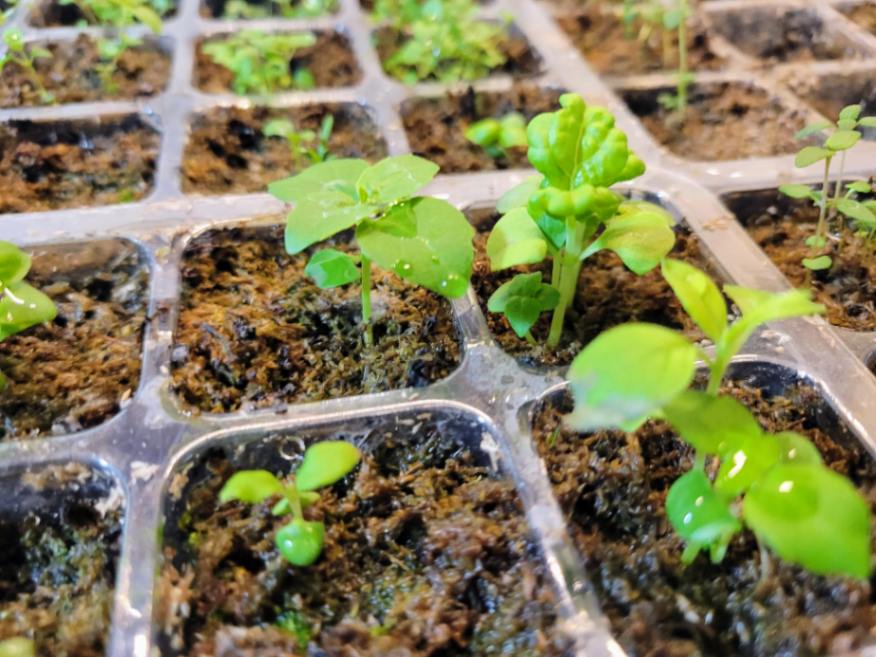
Cotyledons, also known as seed leaves, are the first leaves that appear when a seed germinates. These initial leaves are part of the embryo within the seed and serve as a source of energy for the young plant during its early stages of growth. Cotyledons usually look different from the true leaves that will eventually develop.
True leaves come after the seed leaves and have a more distinct shape and structure. Compared to the cotyledons, they resemble the fully grown foliage of the herb plant. True leaves have an important role in photosynthesis and absorbing nutrients.
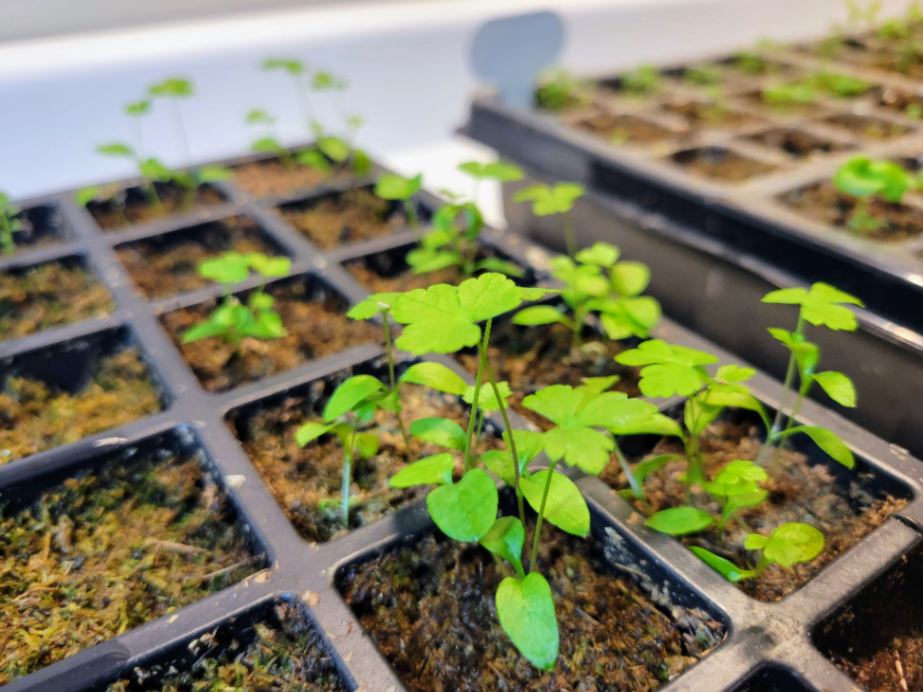
The number of true leaf sets can vary depending on the herb variety. As these new sets of true leaves develop, they become larger and more distinct from each other and from the cotyledons. This progression indicates that the herb seedling matures and prepares for transplanting or repotting.
When to Transplant Herb Seedlings Based on True Leaf Appearance
The ideal time for repotting herb seedlings is generally determined by observing when one or more sets of fully developed true leaves have emerged. This indicates that the seedling has established a strong root system and can sustain itself in a larger container or garden bed.
Repotting too early, when the seedlings only have cotyledons or seed leaves, can disrupt their growth and development, as it can cause unnecessary stress to the young plants, leading to stunted growth or even death.
Waiting too long to repot herbs can also harm the plants, as crowded containers limit root growth and cause nutrient problems or diseases. Determining the right time to transplant seedlings to larger pots for the best growth is important for the health of your indoor herb garden.
Check out my article How to Grow Herbs from Seeds Indoors for in-depth tips and techniques on growing an indoor herb garden.
Balancing Pot Size and Root Development
To ensure the healthy growth of your herb seedlings, it’s important to find the right balance between pot size and root development. Some key points to consider when deciding whether or not to repot your herb seedlings include:
Signs of Root-Bound Plants
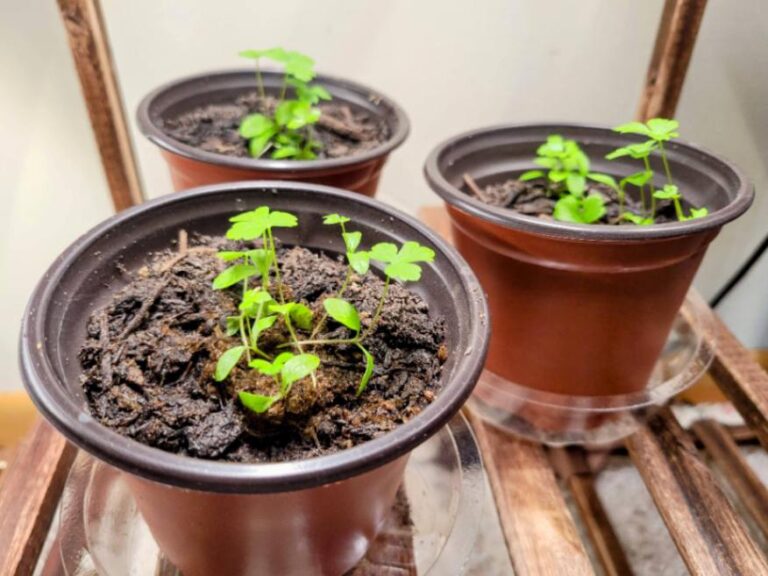
If you see roots coming out of the holes at the bottom of your herb seedlings’ container, it’s time to repot them. This indicates that the roots have outgrown their current space and are becoming root-bound. Observing a dense network of roots circling the inside edges of your starter cell packs clearly indicates that your plants need more room for root expansion.
Impact of Container Size on Root Development
If your herb seedlings are confined to a small pot for too long, their growth can become stunted as they run out of space for new roots to grow. Providing them with a larger pot increases nutrient uptake and promotes healthier root development.

Shop for nursery pots & saucers at Amazon:
Don’t Transplant Herbs Into Too Big of a Pot
While you want to give your herbs room to grow, you don’t want to jump to too big of a pot too soon. I recommend “upsizing” your herbs to a pot around 2 inches (5 cm) larger than its previous container, particularly when your herbs are young.
Transplanting herbs in too large a pot too soon can negatively impact their growth for several reasons:
- Moisture Imbalance: Large pots retain more moisture, causing waterlogged soil and root rot in herb seedlings with limited root systems.
- Root Growth vs. Top Growth: Herbs in oversized pots focus more on root development than foliage growth, leading to less desirable top growth.
- Increased Risk of Pests and Diseases: Excess moisture in large pots creates conditions favorable for pests and diseases, endangering young seedlings.
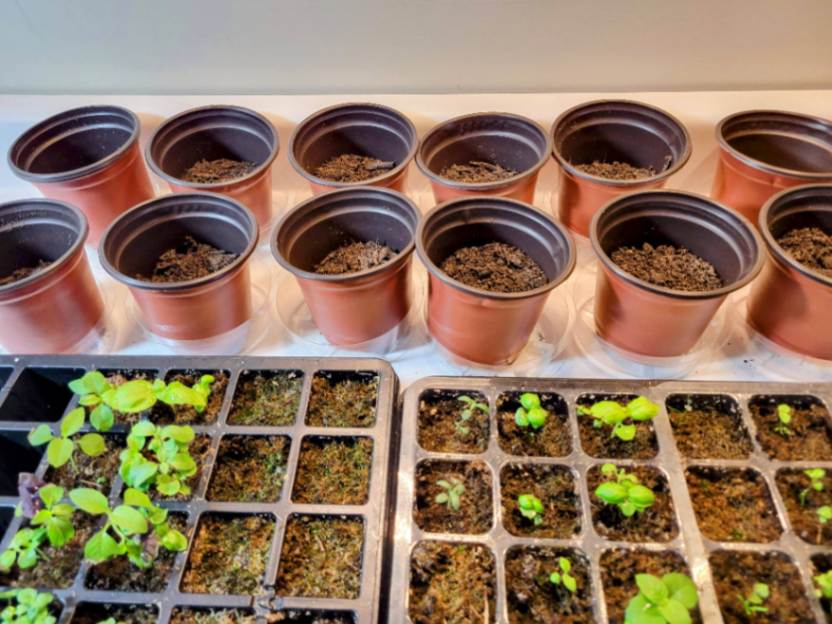
I recommend initially transplanting herb seedlings to a 4” pot, and then once it’s become more established, transplant seedlings to a 6 or 8” pot, depending upon the herb variety.
When to Repot Specific Herbs: A Quick Guide
Each herb has its own specific timeline for transplanting into larger containers, based on the germination time and the herbs’ need for more space. Let’s explore an overview of these time guidelines to ensure your herb seedlings thrive.
| Herb | Repotting Timeline Post-Seeding |
|---|---|
| Basil | 3-5 weeks |
| Cilantro | 3-5 weeks |
| Dill | 4-6 weeks |
| Mint | 5-6 weeks |
| Oregano | 6-8 weeks |
| Parsley | 4-6 weeks |
| Rosemary | 8-10 weeks |
| Sage | 6-8 weeks |
| Thyme | 5-8 weeks |

Let’s look deeper at the timing of when to transplant herb seedlings for specific herbs
- Basil: Basil seedlings typically require repotting after 3-5 weeks of growth or when they have developed at least 2-3 sets of true leaves. This allows the plants to establish a strong root system before being transferred to a larger pot.
- Cilantro: Cilantro seedlings are ready for repotting after about 3-5 weeks or when they have several sets of true leaves. This herb prefers not to be disturbed, so gentle handling during transplanting is essential.
- Dill: Dill should be repotted around 4-6 weeks after planting or when the seedlings have grown a few inches tall. It’s important to repot dill before it becomes too leggy.
- Mint: Mint seedlings should be repotted after around 5-6 weeks or when they have outgrown their initial container. Mint grows vigorously and benefits from having ample space for extensive root systems.
- Oregano: Oregano seedlings usually need repotting after 6-8 weeks or when they have grown a few inches tall, ensuring enough space for their sprawling growth habit.
- Parsley: Parsley seedlings should be repotted after about 4-6 weeks or when they are around 3-4 inches (8-10 cm) tall. Giving parsley enough space promotes robust growth and helps prevent overcrowding.
- Rosemary: Rosemary seedlings can be repotted after reaching a height of about 4-5 inches (10-13 cm), which can take 8-10 weeks after planting. In herb time, this is almost like waiting for a new season of your favorite TV show. This timing ensures the plants have enough room for their woody stems and deep roots.
- Sage: Sage seedlings are best repotted after 6-8 weeks or when they’ve reached several inches in height. This allows them enough time to develop sturdy root systems in a larger pot.
- Thyme: Thyme seedlings can be transplanted into larger pots after approximately 5-8 weeks or when they have established a dense mat of roots in their current container.
It’s important to remember that these time guidelines are averages, and individual plant growth may vary slightly depending on factors such as environmental conditions, overall health, and exposure to sunlight or proximity to grow lights.
Benefits of Repotting Herb Seedlings at the Right Time
Transplanting seedlings at the right time according to each specific herb brings about numerous advantages.
- Enhanced Root Development: Transplant seedlings into larger containers to give herbs more room for root expansion, allowing for better nutrient absorption and overall plant health.
- Prevents Stunted Growth: If herb seedlings are kept in small pots for too long, their roots can become cramped and hindered, leading to stunted growth and diminished productivity.
- Improved Water Drainage: Larger pots offer better drainage, preventing waterlogged soil that can lead to root rot or other moisture-related issues.
- Facilitates Proper Nutrient Uptake: Repotting allows you to refresh the potting mix, ensuring a steady supply of nutrients for the growing herbs.
By following these time guidelines to transplant seedlings at the right stage of growth, you set your herb garden up for success and maximize potential yield in terms of flavor and aroma.
Preparing for Repotting
Selecting the Right Containers & Sizes
Choosing the right containers and sizes is crucial. Opt for containers that have drainage holes at the bottom to prevent waterlogging, which can lead to root rot. Ensure that the containers are large enough to accommodate the growing roots of your herbs.
Here are some key points to consider:
- Use pots made of materials like terracotta or plastic. Both terracotta and plastic pots will provide good drainage.
- The container size should be appropriate for the specific herb you are growing. As a general rule, choose a pot that is 1-2 inches larger in diameter than the current container.
- If you plan on growing multiple herbs together, select a larger pot that allows sufficient space for each plant’s root system.
- If you plan to transplant seedlings outside eventually, consider using peat pots to reduce the risk of transplant shock.
Choosing the Right Soil
The type of soil you use plays a vital role in providing essential nutrients and promoting healthy growth in your herb garden. When repotting, it’s important to select the right soil composition.
Consider these factors when choosing soil:
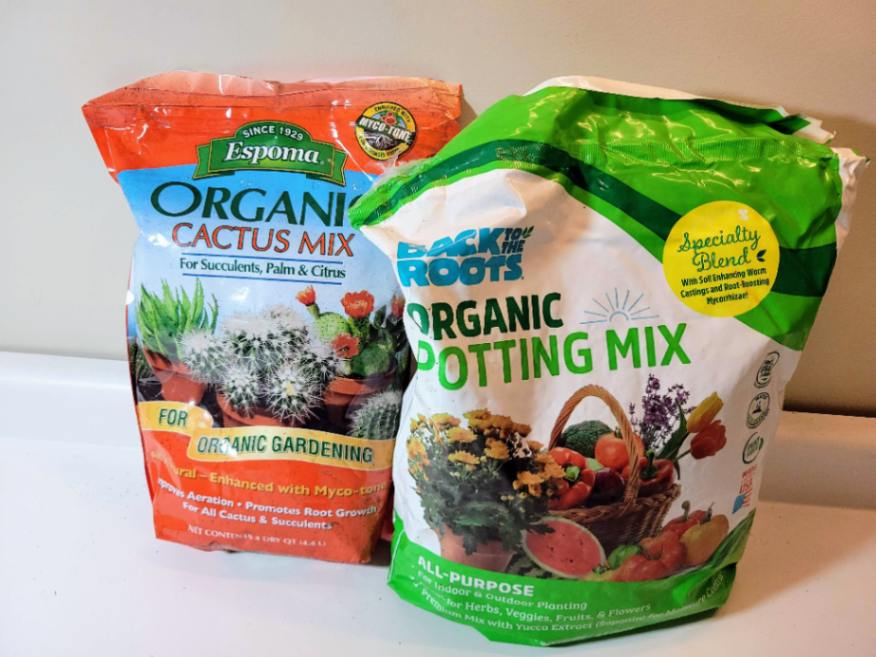
- Opt for well-draining soil mixtures specifically formulated for herbs or vegetables. These mixes usually contain a combination of organic matter such as compost or peat moss. Some great potting mixes I’ve used include:
- Back to the Roots Organic Potting Mix (Amazon)
- Miracle-Gro Potting Mix (Amazon)
- Avoid using heavy soils that retain too much moisture, as this can lead to root rot.
- Ensure that the soil pH is suitable for your herbs. Most herbs prefer slightly acidic to neutral pH levels (around 6.0-7.0).
- For drought-tolerant herbs such as rosemary, sage, and thyme, it helps to mix in a cactus or succulent mix in a ratio of about 1:3 (one part cactus mix to 2 parts potting mix) for improved drainage and root health. I’ve had success with Espoma Organic Cactus Potting Soil Mix (Amazon).
For more information on choosing soil and growing mediums, see my article on What is the Best Soil for Indoor Herbs.
Water Seedlings Before Repotting
Before repotting your herb seedlings, it’s essential to water them adequately. This helps loosen up the roots and makes removing them from cell packs of your seed trays easier without causing damage.
Water your seedlings thoroughly an hour or two before repotting. This ensures that the soil is evenly moist and the roots are hydrated. Avoid overwatering, as excessive moisture can make removing the seedlings from their containers difficult.
Remember that each herb may have specific requirements, so it’s essential to research individual plant needs to provide optimal growing conditions.
Transplanting Herb Seedlings: Step-by-Step Guide
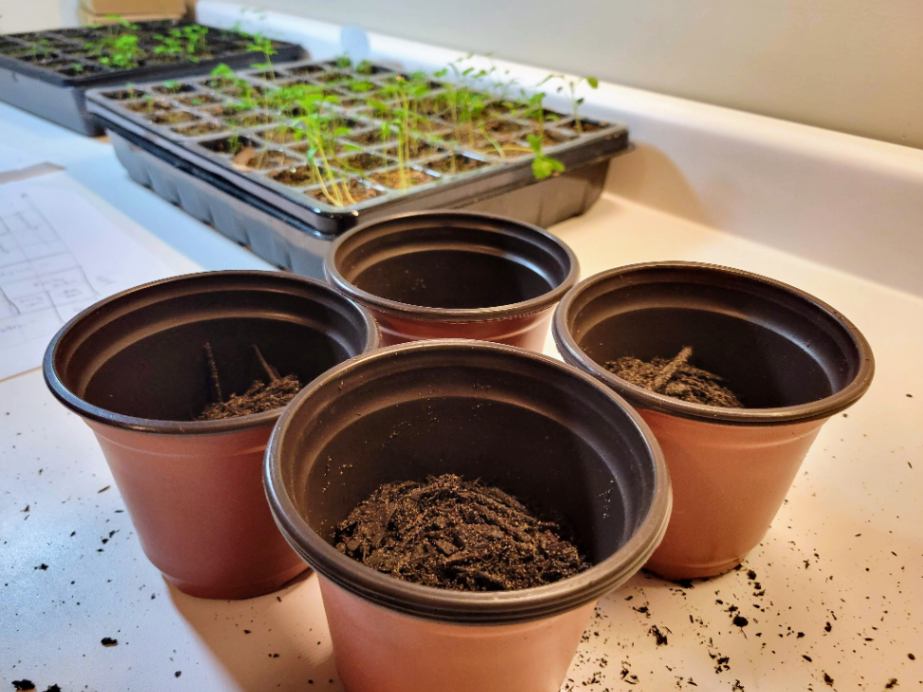
1) Prepare Pot with Soil
Choose a pot that provides enough space for the roots to grow and has drainage holes at the bottom. Fill the pot to about 1/3 full with a well-draining potting mix, with a bit of a hole in the center for the root ball.
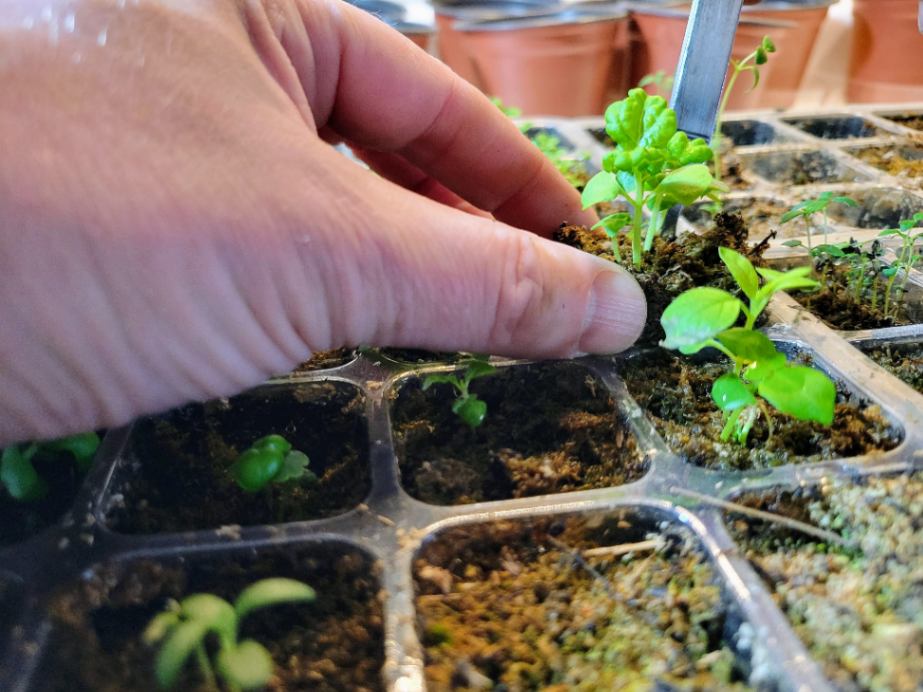
2) Remove Seedling Gently
With a fork, spoon, or other small tool, carefully loosen the soil around the seedling and lift the seedlings from the cell packs of your seed trays. Avoid pulling on the stem, as this can damage delicate roots.
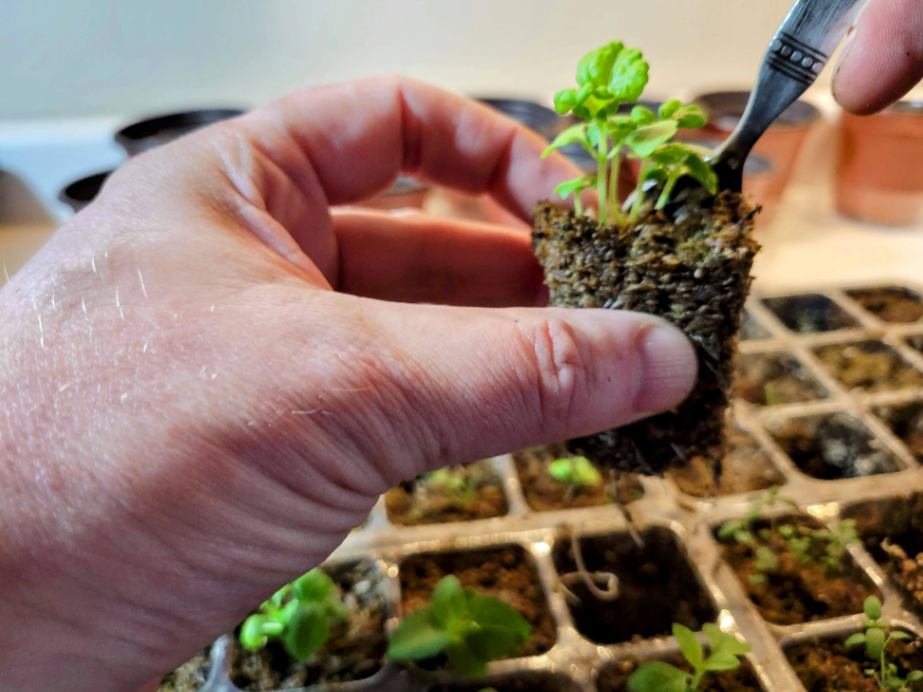
3) Root Inspection and Adjustment
Before transplanting, take a moment to inspect the roots of your herb seedling. Look for any tangled or circling roots and gently tease them apart or trim them if necessary. This will encourage healthier root growth once transplanted into its new pot. It’s important to handle the delicate root ball carefully during transplantation.
4) Transplant Herb Seedling into a Larger Pot
Ensure the hole in the center of the prepared potting mix is deep enough to accommodate both the root ball and some additional soil around it. Place your seedling into this hole, making sure that it sits at about the same depth as it did in its original container.

5) Backfill Planting Mix Around the Herb Seedling
Use a spoon or your fingers to add planting mix to the area between the herb seedling and the new container. Don’t press down the planting mix too firmly as you don’t want to compact it. Give the new container a gentle shake when finished to help things settle.

6) Water After Transplanting
Once you have successfully transplanted your herb seedling, thoroughly water it. This will help settle the soil around its roots and provide essential moisture for growth. Be careful not to overwater, as excessive moisture can lead to root rot.

By following these step-by-step instructions, you can ensure that your seedlings have the best chance of success in their new environment. Remember to provide adequate sunlight, water, and care as they grow.
Thinning Out Overcrowded Herb Seedlings
I know that thinning seedlings is painful for many gardeners, but you have to do it!
If you don’t thin your herb seedlings to allow a small number of them to succeed, none will.
Overcrowding among herb seedlings leads to competition for essential resources such as water, nutrients, and sunlight. To ensure the healthy growth of your herbs, it is crucial to thin out overcrowded seedlings.
Prevent Competition for Resources
By thinning out the overcrowded seedlings, you create more space for each plant to thrive and access the necessary resources without competing with their neighbors. This allows them to establish strong root systems and develop into robust plants.
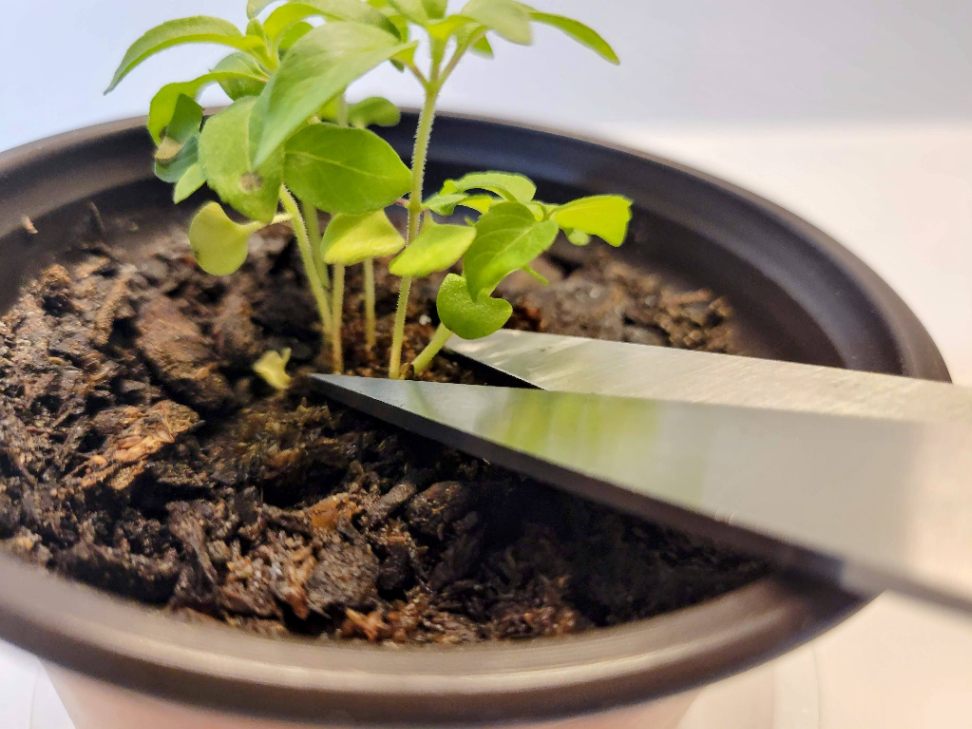
Snip off Weaker Seedlings
To thin herb seedlings effectively, it is best to snip off the weaker ones rather than pulling them out from the soil. Pulling out seedlings can disturb the roots of neighboring plants or cause damage to nearby healthy roots, particularly when the seedlings are still in starter cell packs. Instead, use a pair of sharp scissors or garden shears to cut weaker seedlings at soil level. This method minimizes disruption and ensures that the remaining plants remain undisturbed.
Allow Sufficient Spacing
Once you have identified which seedlings need to be removed, it’s important to allow sufficient spacing between the remaining plants. Each herb has different requirements for spacing based on its growth habit and size at maturity.
By providing adequate space between your herb seedlings, you allow them room to grow without being crowded by neighboring plants. This promotes better air circulation and reduces the risk of diseases caused by damp conditions.
Aftercare Tips for Repotted Herb Seedlings
After transplanting, it is important to keep a close eye on your newly potted herbs and ensure they receive adequate care. Water your seedlings regularly, but be mindful not to overwater as this can lead to root rot. Allow the soil to dry out slightly between waterings, ensuring that it remains moist but not saturated.
See my article on How to Water Indoor Herbs: Effective Hacks for guidelines on how often to water specific herbs and to learn what mistakes to avoid when watering indoor herbs.
Provide your herbs with sufficient sunlight by placing them in a sunny location or using grow lights if necessary. Keep an eye out for any signs of pests or diseases and take prompt action if needed, as early intervention is key to preventing damage.
By following these aftercare tips and providing your plants with the right conditions, you will set them up for success in their new pots. Remember that each herb may have specific requirements, so research individual plant needs for optimal results.
Shop indoor plant stands at Amazon
Frequently Asked Questions (FAQs)
How do I know if my herb seedlings need to be repotted?
If you notice roots coming out of the drainage holes of your herb seedlings’ current pots or cell packs, it’s a clear sign that they need to be repotted. If the soil dries out too quickly or the plants show signs of stunted growth, it may be time for a larger pot.
What type of container should I use for repotting my herb seedlings?
Choose a container with drainage holes at the bottom to prevent waterlogging and root rot. Clay pots or plastic pots with good drainage are commonly used for repotting herbs. If planning to transplant seedlings outside, consider using peat pots to reduce the risk of transplant shock when relocating your herbs to a garden outside.
How do I prepare the new pot for repotting my herb seedlings?
Before you transplant seedlings, make sure the new pot is clean and sanitized. Rinse it with warm water and mild soap, then rinse thoroughly to remove any residue that could harm your herb plants.
Should I fertilize after repotting my herb seedlings?
It’s generally not recommended to fertilize immediately after repotting as this can stress the plants further. Herbs are not heavy feeders and typically do not require extra fertilization at all. If you choose to fertilize your herbs, wait for a week or two after transplanting before fertilizing.
Last Updated on 7 May 2024 by Bob Lee