
This post may contain affiliate links which means I may receive a commission for purchases made through links. I only recommend products that I have personally used. As an Amazon Associate I earn from qualifying purchases. Learn more on my Private Policy page.
When it comes to preserving the robust flavors of woody, hardy herbs like rosemary, sage, thyme, and oregano, certain drying techniques are more recommended than others.
As a general rule. drying methods that do not require the application of heat are the best methods for drying hardy herbs like rosemary, sage, thyme, and oregano. Methods like air drying or using a food dehydrator at low temperatures are ideal, ensuring these herbs maintain their natural oils.
- Air Drying: Of all the herbs to consider for air drying, woody-stemmed herbs such as rosemary, sage, thyme, and oregano are in fact the best types of herbs to air dry. These herbs are particularly well suited to this drying method due to their low moisture content, which makes them less prone to mold and spoilage during the drying process.
- Using a Food Dehydrator: Using a food dehydrator at low temperatures is another excellent option for dry hardy herbs such as sage, rosemary, oregano, and thyme. It can significantly reduce the drying time while still retaining most of the aroma and flavor of these herbs compared to air drying.
Let’s dive into how to dry herbs using these drying methods so you can preserve your herb garden harvest.
Table of Contents
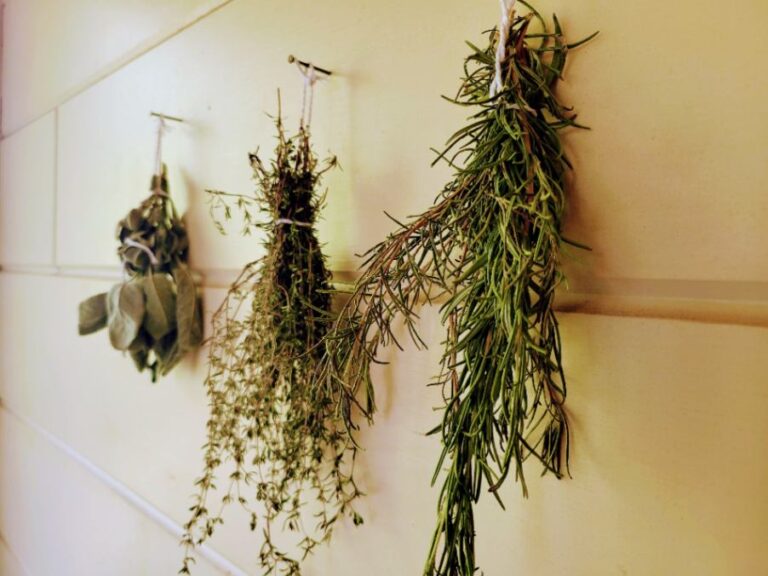
How to Air Dry Rosemary, Sage, Thyme & Oregano
To air-dry woody herbs such as rosemary, sage, thyme, and oregano, first harvest your herbs, bundle them together, and hang them to dry in a well-ventilated area for 2-3 weeks. Once dried, remove the herb leaves from the stems and store them in airtight containers in a cool, dark place for up to one year.
To successfully air dry your herbs, it’s critical to dry them in a location that is well-ventilated and with low humidity. It’s also important to keep your herbs out of direct sunlight while they are drying.
Harvest the Herbs
Harvest fresh herbs from your garden, preferably in the morning when essential herbs are most concentrated. Try to give these drought-tolerant herbs a moderate watering the day prior to ensure they are well-hydrated for harvest.

For tips and techniques on harvesting specific hardy herbs, check out my herb harvesting articles here:
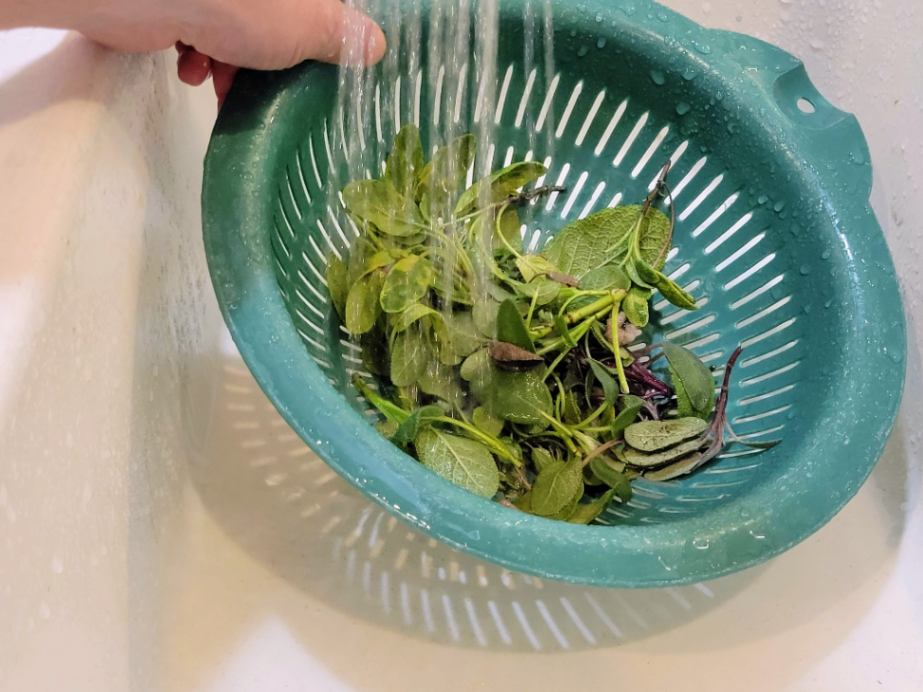
Rinse and Dry Herbs
Gently rinse off your herbs under cool water to remove any dirt, debris, or insects. Shake them off and then pat them dry with paper towels or a clean kitchen towel to remove any excess water. Let them air dry before bundling them up to make sure there is no remaining moisture.
Bundle the Herbs Together
Gather your herb sprigs into small bundles of anywhere from 4 to 8 sprigs depending upon how bushy your herbs are. You want to make sure each bundle gets enough airflow to dry evenly.
Tie your bundles together at the bottom of the stems using kitchen twine, string, or rubber bands. Tie them tight enough to hold the herbs together. Note that the herbs will likely loosen up a bit as they dry, so make sure you tie them nice and snug.

Hang Herb Bundles Upside Down
Hang your herb bundles upside down in a dry, well-ventilated area. Ideally, this location should be cool, dark, and away from direct sunlight. Good airflow is important to prevent mold growth and spoilage.
Some home gardeners elect to place a paper bag (with holes in it for ventilation) over each bundle of herbs to protect the herbs from dust and for color preservation. If you’re storing your herbs in a particularly dusty or high-traffic area this may be beneficial, but I don’t feel it’s a necessity.
Let Herbs Dry for 2-3 Weeks
Allow the herbs to dry for several weeks, but start checking them in 7 to 10 days. It typically takes woody herbs such as thyme, sage, rosemary, and oregano between 2 to 3 weeks to completely dry out, but it can take longer depending upon drying environment conditions such as humidity level.
Let your herbs fully dry out and become brittle before storing. If you see any signs of molding or spoilage, discard the herbs right away.
Remove Herb Leaves from Stems
Once your herbs have thoroughly dried, you can remove the dried herb leaves from the stems for storage, although this isn’t strictly required. To remove leaves from stems, hold the thicker end of the herb stem and run your fingers along the stem in the opposite direction. If desired, crumble the herbs before storing them.
Store Dried Herbs
Store your dried herbs in airtight containers or glass jars with lids. Make sure to label and date your dried herbs for future reference. Store your herbs in a cool, dark place to maintain their flavor and aroma.
When stored properly, dried herbs can be kept for up to one year, but they generally have the best flavor and aroma when used within the first 6 months after drying them.
How to Dry Hardy Herbs with a Food Dehydrator
If you’re pressed for time and require a faster herb-drying method compared to air drying, using a food dehydrator is another excellent option. Dehydrating retains the majority of your herbs’ flavor and aroma.
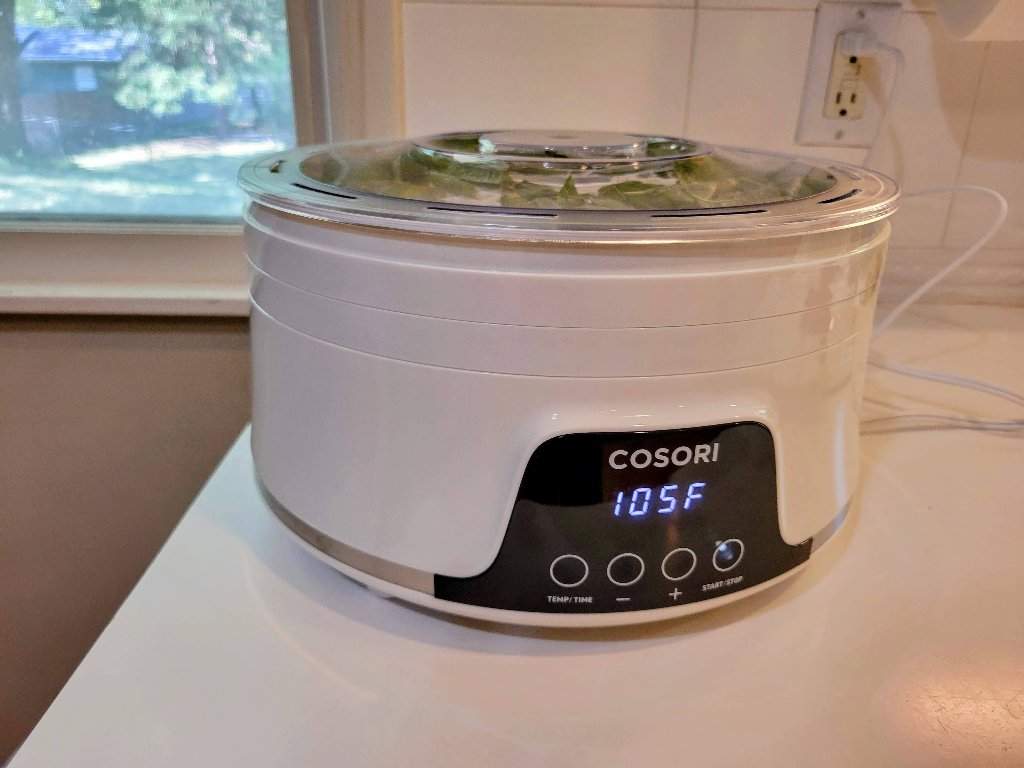
To dry herbs such as rosemary, sage, thyme, and oregano in a food dehydrator, rinse and dry your herbs, lay them out on dehydrator trays, and dehydrate them at 95-105°F until thoroughly dried. Condition the herbs for 2 weeks to ensure no moisture remains. Store dried herbs in airtight containers for up to one year.
Harvest & Rinse Herbs
Start by harvesting your herbs in the morning when their essential oils are most concentrated. Rinse your herbs gently under cool water to remove any dirt or insects. Pat them dry with a clean kitchen towel or paper towel.
Prepare the Dehydrator
Get your food dehydrator out and prepare it for us according to the manufacturer’s instructions. Ensure the trays or screens are clean and that you have plenty of room to work around your dehydrator.
Remove Leaves from Stems (Optional)
Depending on how fine the mesh is in your dehydrator trays, you may choose to remove leaves from the stems before dehydrating, as it may give you more capacity in your dehydrator trays or screens.
I typically leave smaller leaved herbs on the stems while they are dehydrating, as the smaller leaves tend to fall through the trays while they are dehydrating. I only remove leaves from large-leaved herbs like sage or basil to be placed directly on the trays before the dehydrating process.
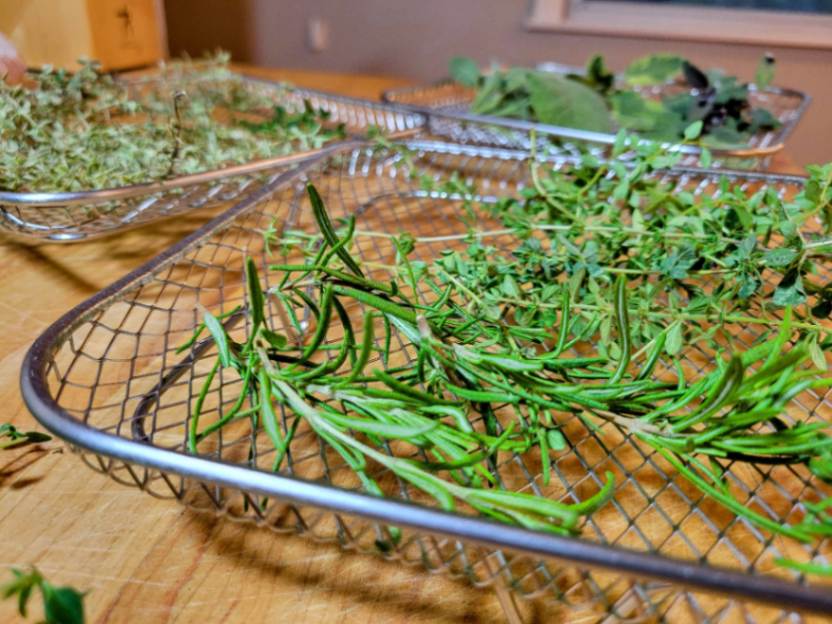
Spread Herbs on Dehydrator Trays
Lay out your herb stems or leaves in a single layer on the dehydrator trays or screens, ensuring they are not touching or overlapping. This allows for proper air circulation and even drying.

Set Time, Temperature and Start the Dehydrator
Herbs should be dried at low temperatures, generally between 95°F and 105°F (35 – 41°C), to preserve their essential oils and flavors.
Set your food dehydrator to between 95°F and 105°F and set the time based upon the suggested guidelines below. Begin checking your herbs at the low end of the suggested time range.
| Herb | Dehydration Thyme |
|---|---|
| Oregano | 6-8 hours |
| Rosemary | 5-8 hours |
| Sage | 9-12 hours |
| Thyme | 4-6 hours |
Monitor the Drying Process
Check the herbs periodically, as drying times can vary depending on the thickness of the leaves, the humidity level, and your specific food dehydrator. The herbs are ready when they are completely dry, brittle, and easily crumble between your fingers.
Note that some herbs may take even longer than the high end of the range depending upon the dehydrating conditions.
Condition Herbs Before Storage
Conditioning is a process used in food dehydration to improve storage quality and reduce the risk of mold and spoilage by ensuring enough moisture has been eliminated.
To condition your herbs, let them cool after dehydrating, then transfer the herbs to a food-grade container and cover them tightly. Shake the container once daily for about 2 weeks, monitoring the container of dried herbs for any condensation or signs of spoilage.
If condensation appears in the container, dehydrate your herbs again for several hours, let them cool, and then begin the conditioning process again.

Store the Dried Herbs
Dehydrated and fully conditioned herbs should be stored in air-tight containers in a cool, dark place. Make certain to label and date your herb containers. It’s also important to regularly check your dried herbs for signs of mold or any spoilage. If spoilage is discovered, discard the impacted herbs immediately. Properly dried and stored herbs can last up to one year.
Other Methods for Drying Hardy, Woody Herbs
Other methods for drying herbs typically require the application of heat using an oven, air fryer, or microwave. Although these drying methods may expedite the drying process, it’s important to note that they can lead to a more significant degradation in the quality of woody herbs when compared to more delicate herbs such as basil and parsley. For this reason, drying herbs like rosemary, thyme, sage, and oregano with heat is not recommended.
Drying Hardy Herbs in an Oven
While it is not an ideal drying method for woody herbs such as thyme, sage, oregano, and rosemary, it is possible to dry these herbs in an oven. To do so:
- Preheat your oven to 170°F: Set your oven to its lowest temperature, which is typically around 170°F (76°C).
- Arrange herbs on a baking sheet lined with parchment paper. Arrange them in a single linger without overcrowding them to allow adequate airflow.
- Prop the oven door open slightly to allow moisture to escape while the herbs are drying.
- Dry Herbs for 30 to 90 minutes, checking the herbs every 30 minutes. Keep an eye on your herbs until they become crispy and crumble easily between your fingers.

Drying Woody Herbs in an Air Fryer
In my own experiments, I found that using an air fryer for herb drying tends to yield better results in preserving herb quality compared to using an oven. You can read about my experiment testing 5 different herb drying methods here.
To dry herbs such as rosemary, thyme, sage, and oregano with an air fryer, follow these steps:
- Rinse & Dry Your Herbs: Prepare your herbs by washing them thoroughly and patting the leaves dry with paper towels.
- Place the prepared herbs in contained trays or baskets inside the air fryer. It’s important to contain them so they don’t fly around the air fryer due to convection and come into direct contact with the heating elements.
- Dry herbs for 10-20 minutes: When using an air fryer without a dehydrator mode, set it at its lowest temperature setting (usually around 170°F / 76°C) and let it run for 10-20 minutes. It’s important to check the herbs often to prevent them from over-drying or burning.
Drying Hardy Herbs in a Microwave
Using a microwave to dry hardy, woody herbs is not a preferred drying method due to significant deterioration in aroma and flavor, but it can still be done in a pinch. To dry these herbs in a microwave, follow these steps:
- Microwave small batches: Work in small batches of herbs to ensure even drying. Place a small handful of herbs on a microwave-safe plate or paper towel.
- Use medium-high power settings on your microwave to help prevent the leaves from getting overcooked.
- Timed intervals: Microwave your herbs in 20-second intervals for better control over the drying process.
- Check for brittleness: After each interval, check your herbs for dryness. They are ready when they become brittle and crumble easily.
- Multiple cycles: The drying process may require 4 or 5 cycles, depending on the moisture content of herbs and your microwave’s power output.
Conclusion
Rosemary, sage, thyme, and oregano are all very drought-tolerant herbs that are packed with essential oils. In addition to responding well to similar drying methods, these woody herbs, interestingly, also all grow extremely well together. See my articles on companion planting with rosemary, sage, oregano, and thyme for more information.
To dry robust herbs like rosemary, sage, thyme, and oregano, it’s best to use non-heat drying methods such as air drying and low-temperature food dehydration. Air drying is ideal for its simplicity, and it works particularly well for herbs like rosemary, sage, thyme, and oregano due to their low moisture content. For a quicker option, use a food dehydrator as it still preserves most of these herbs’ essential oils and flavors.
Avoid heat-based methods like oven and microwave drying, as they can compromise herb quality. If you choose the right method, you can enjoy the full flavor of your preserved herbs year-round. Happy cooking and gardening!
Frequently Asked Questions (FAQs)
How Long Can You Keep Dried Herbs?
When properly stored, hardy dried herbs such as rosemary, sage, thyme, and oregano can stay good for up to one year, but for best flavor, they should be used within the first 6 months.
Is It Better to Dry or Freeze Herbs?
Drying herbs is better for preserving woody herbs like rosemary, sage, thyme, and oregano. It retains flavor and aroma while extending shelf-life. Freezing can help to maintain texture and flavor for more tender herbs like basil, parsley, and cilantro. Method choice depends on the herb type and intended culinary use.
How Do You Know When Herbs Are Done Drying?
Herbs are fully dried when they become brittle and crumble easily between your fingers. Properly dried herbs should not feel moist or bendable. Checking for these signs will ensure your herbs are ready for storage.
How Long Can I Store Dried Herbs?
Dried herbs can be stored for up to one year when kept in airtight containers in a cool, dark place. To maintain their flavor, label, and date the containers. Use the herbs within the first six months for the best flavor and aroma.
Last Updated on 13 October 2023 by Bob Lee